I use modern technology, but there is still a lot of hand work involved in what I do. I'm from the old school and kind of anti-industry. I learned my quilting skills from female relatives who made their own tools and did everything the hard way. They cut their templates out of cereal boxes. They used carpenters math and measured everything. Now, we have laser cut acrylic templates that are marked so there's no math and no thought to cutting. They make cutting easier and faster with fewer mistakes, but they're expensive. I decided to make my own templates to save money.
Save images of cutting templates to your computer. Launch your image editing program.
Open the template image.
Click on the Pen Tool. Point to Point; Line Width: 2; Foreground: Black; Background: Null. (If you need straight lines, choose Line. Click and hold down the shift key while dragging the line across the image.)
Click on each point of the shape. I'm making a 45 degree diamond. When you come to the last point, click just short of the first node. Move the last node to Join with the first.
Click on Edit Mode and double click anywhere on the image.
Draw a new line over a line on the image. Repeat as many times as necessary until you have all the lines traced. You can change the line from solid to dashed before you draw the line.
Edit>Copy>Paste as New Image.
Image>Resize. Width: 2.5 Height: 4.5 Inches, (or size needed for your shape) Resolution: 300. Resample using Smart Size. Lock aspect ratio. Resize all layers. You can resize an image larger or smaller than the original.
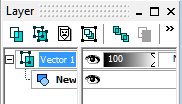
Right click on the vector layer of the first image and convert to raster layer.
Click on the Text Tool with settings: Arial, 24 pixels, Line Width 1, Center, Foreground and Background Black. Label the shape according to finished sizes.
Image>Mirror. File>Print Layout. Drag and drop the image onto the white area and center it. File>Print Setup. Open printer properties. Choose Inkjet Transparency, Greyscale, High Quality, Best.
------------------------------------------------
*Optional step for saving a Shape.
Go back to the original pen image. Edit>Copy>Paste as New Image.
Click on the vector layer.
Double click on the vector shape. Give the shape a unique name.
Right click on the vector layer, choose Properties, and give it the same name.
File>Export>Shape. Give the shape the same name.
Now, you have the shape stored if you ever need it again.
------------------------------------------------
Print on inkjet transparency film. If your templates are small enough, you can print more than one per sheet. Let the ink dry.
Spray the printed side with a few coats of clear acrylic sealer.
Cutout main shape. Punch a hole at the top 1/2" for hanging.
You can use this method for making individual fussy cut templates as well.
This is a selection of the templates I've printed. A few of them were printed on two sheets and glued together. If I had purchased all the available quilting templates on the market, I would've paid $1,090.20!!!!! That's how much I've saved by printing my own.
If you want to make an acrylic template, buy an 11x14" sheet of 1/8" thick styrene at Home Depot for $4.60. Several small templates can be cut from one sheet.

Spread an even, thin layer of glue on the acrylic shape. Carefully place the transparency on the acrylic shape. Smooth out any wrinkles or air bubbles. Clamp together. Let dry and drill a hole in the acrylic. If you want to make it magnetic, attach sticky magnet dots to the outside edge.


This is great! Thank you. :)
ReplyDeleteYou're very welcome!!
Delete