
What Doesn't Work


 There is also a water erasable stamp pad for stamping embroidery designs. Available from Scrapbooking Warehouse.


Pink pen : Automatically disappears in 1-7 days;
Purple pen : Automatically disappears in 2-14 days;
Green pen : Automatically disappears, or erasable by water;
White pen : Automatically disappears, or erasable by water
Blue pen : Automatically disappears, or erasable by water.


Every quilters favorite is the Pilot Frixion gel pen which is heat erasable. The ink leaves behind a white mark because it contains an optic brightener that will bleach fabric. The color returns at 14 degrees F, but the ink washes out completely. The best buy is the 12 pack for $26.00. Colors include: Black, Tea brown, Green, Lime Green, Sky-Blue, Blue, Purple, Pink, Red, Orange, Mountain Yellow and Yellow. You'll have to buy grey here for $2.15. There are also heat erasable pencils and felt tip markers.

 Miracle Marker is the holy grail of quilt marking tools because it is heat erasable. It isn't chalk at all, but zinc stearate, a waxy water insoluble powder. It is used in cosmetics as a water repellant and skin protectant. It is also used to whiten candles and as a mold releasing agent in candle making. Two ounces of Miracle Marker normally sells for $4.49-7.49, but you can buy one pound of zinc stearate from TKB Trading for $11.95.
 I like the heat erasable chubby marker, but using a pencil sharpener eats it up. I could barely mark a throw size quilt with it.


 Cleaning vinegar removes water and air erasable pencils and markers.


Sometimes the best way to mark a quilt is to not mark it. You may think 10lb tissue paper is a good option, but it isn't because it's too delicate and tears easily. It also cannot be printed. Freezer paper is popular because it is double sided, can be printed on, tacked down with an iron and stitched through. However, it is very heavy (35lb) and pulling it will always pop stitches. It also separates from fabric easily while stitching. However, it's great for appliqué or paper piecing templates. Tracing paper or drafting vellum is a better option. Foundation paper is drafting vellum so you can print paper piecing blocks with it as well. Printing on roll tracing paper is a good way to mark continuous lines. It prints easily if it's heavy enough. The best brands for printing are: Daler-Rowney (9x12" pad available at Walmart), 1000H Clearprint Drafting Vellum (available as loose 8.5x11" sheets or roll) and Pro Art Tracing Vellum (available as an 8.5x11" pad). Being made of cotton means that it adheres to cotton fabric with minimal tacking. A few stitches will hold it down. The problem with using tracing paper is that it dulls a needle. Thin tracing paper (Blick Studio brand) stitches easily, but doesn't print well.


Dressmaker's pencils and French tailor's chalk are composed of talc, kaolin, wax, and pigment. These "chalks" are best used for clothing construction on the wrong side of the fabric or to mark cutting lines that will not be visible. Never use them to mark quilting lines!
General's yellow fabric pencils and Dritz chalk leads are the same thing.
The silver quilters pencil doesn't even erase from paper. It is intended for marking leather, not fabric.

I absolutely hate water erasable markers because they bleed. The ink is a pH indicator. No matter how much or how little water is applied, the marks return again and again even with soapy water. It doesn't help that heat makes the marks permanent. A lot of quilts have been ruined by them. I haven't tried the ball point version. Always use cold water to remove the marks. A completed quilt has to be soaked in cold water before it is washed. These weren't intended to mark a quilt. They were intended for marking embroidery lines. I don't recommend them for quilting.


Air erasable markers are next on the list. Quilters complain about the marks disappearing too soon. If you want the mark to re-appear, rub ammonia on it. To make the mark disappear faster, rub cleaning vinegar on it. The ink is a combination of high and low pH indicators and lye that rely on the chemistry of alkali versus acid. These were also intended for marking embroidery lines, not quilting lines.
The Adger Chako Ace Marker from Japan, being both air and water erasable, is two markers in one. It disappears in 14 days and removes immediately with water. I must say that it's no better than the other brands. It only comes in different colors. A 12 piece set of pink, purple, blue, green, cyan and white is available on eBay for $19.75. Individual pens are available here.
Manufacturers instructions:
Pink pen : Automatically disappears in 1-7 days;
Purple pen : Automatically disappears in 2-14 days;
Green pen : Automatically disappears, or erasable by water;
White pen : Automatically disappears, or erasable by water
Blue pen : Automatically disappears, or erasable by water.
Cyan pen : Erasable by water.
Do not use solvents or cleaning agents.
Air and water erasable markers were intended for marking Aida cloth, not quilting fabric.
What Does Work
Iron Off
Dritz now has heat erasable pens including white. They write smoother than the Pilot pens. The white only shows up on black or very dark fabric and sometimes takes a few seconds to be visible. These pens don't write well on paper. I don't like these pens because they stop working after a couple of uses, but the white is only available from this brand.
I also found heat erasable pens from China on Ali Express. Colors are: violet, green, yellow, black, red and blue. This 6 color set sells for $3.99. I'm very pleased with these; they work as expected. They're better quality than Dritz and smoother than Pilot. Why can't they make white? 😭


Wash Out
I've discovered a new water erasable ball point textile pen from China. It's available in black, silver, green, cyan, blue, pink, yellow and red. A 10 piece set is available on Ali Express. Color refills are available here. White refills are available here. Silver refills are available here. Empty pens are available here. This one is truly water erasable, except for silver which is intended for marking leather and isn't removable.
Water erasable pencils are made of talc and azo dye. They're removable with textile detergent.
I haven't tried the stencil marking spray yet. It's probably talc mixed with a surfactant and water. I need to experiment with duping it. The Sulky stencil tack adhesive is environmentally friendly with low over spray. My best advice is to spray the back of the stencil lightly outside and let it get tacky before applying it to a quilt.
Rub Off

Sewline pencil leads break easily and snag on fabric, so I don't use them much. A better option is their chalk pencil. The 1.3mm lead writes smoothly on fabric and doesn't require sharpening. It's available in white, blue, and pink. The downfall is that refills aren't available.
The best all purpose markers are General's Fabric Chalk pencil and chaco liners. They are made with talc and azo dye. The chalk wipes away easily with a lint brush. I use canned air to remove excess powder and scotch tape to remove hard lines. Any color left behind after brushing washes away. Chalk transfer paper is great for transferring large images. I prefer the gray, white, and yellow. Spray fabric with hair spray after marking lines. The chalk won't rub off so easily and the hair spray washes out.
Alternatives and DIY

Soapstone can be sharpened with a standard pencil sharpener. It's cheap and washes off easily. Get it from a welding supply store like James Supply, Grainger, or Harbor Freight. They have round sticks and holders.
White Tailor's chalk is also soapstone and is now available as a click pencil with refills. It's on eBay.

Ivory Bar Soap is cheap, readily available, and always washes out. Shred it with a cheese grater over a small bowl. Add just enough hot water to melt it. The consistency should be like a very thick cream. Pour it into a bottle ice tray or a 10 ml centrifuge tube. Let the soap cure and harden. Sharpen it with a jumbo crayon sharpener. It's a good substitute for the chubby marker.
Talc is used for marking because it doesn't bond with fabric and leave a mark the way chalk (calcium carbonate) does. It also doesn't bind with water and ball up like cornstarch. It brushes away and rinses off easily. Talc is also known as French chalk, soap stone powder and rhapsody talc. It is a hydrous natural mineral consisting of silicon, oxygen and magnesium. It's almost impossible to find unscented talc on store shelves in the US. You can use baby powder, but don't use the aloe or medicated versions. Since the asbestos lawsuit, people have shied away from talc as a primary cause of ovarian cancer. However, it has since undergone a purification process to ensure there is no asbestos. TKB sells pure rhapsody talc for $16.65/pound. Pickling lime is a good substitute for talc if you don't want to use it.
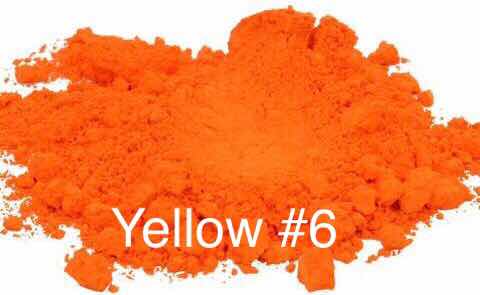
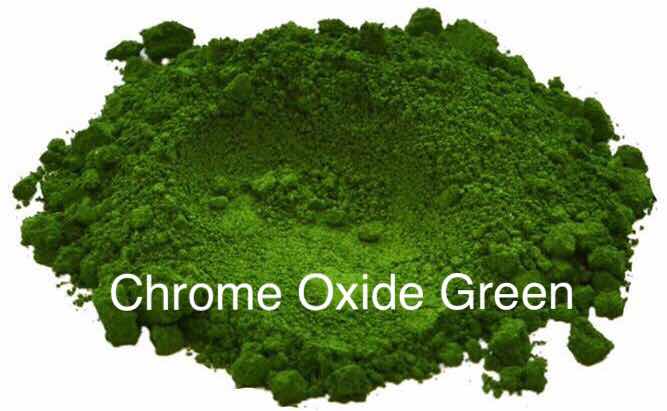
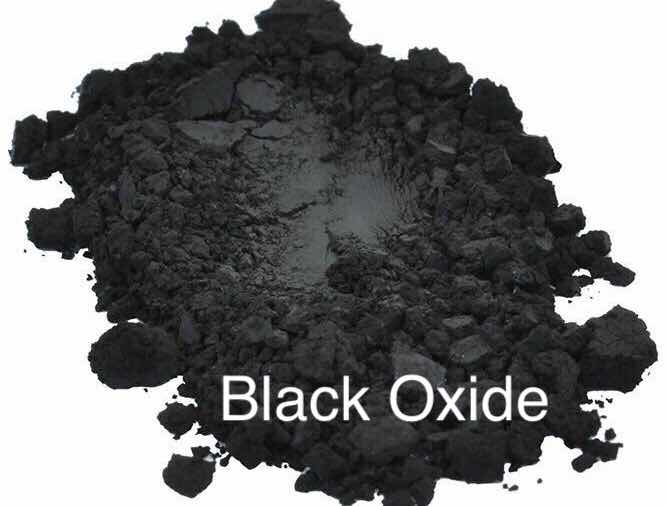
You will need the following Lake dyes: Red #30, Red #27, Yellow #6, Yellow #10, Chromium Oxide Green, Blue #1 and Manganese Violet. Ultramarine blue is typically used for the light and dark blue sold commercially. You will also need Black Oxide for gray. Talc by itself works for white. Any pigment you use has to be hydrophobic (doesn't mix with water).
Colored "Chalk"
Add talc and pigment to the cup of an herb or coffee grinder and blend to combine. Use rice to clean the grinder. Blow out any left over powder with canned air. Wipe away residue with a dry tissue.

1/2 tsp. Talc or pickling lime
1 Pinch pigment for light color
1 Dash for dark color
Mini funnel (use a spoon to fill)
Chaco liner

1 oz Talc or pickling lime

2 oz Talc or pickling lime
1 Tad pigment for light color
2 Tads for dark color
Pounce
4-8 oz Talc or pickling lime
2 Tads-3 grams pigment for light color
4 Tads-6 grams for dark color
80/20 or 100% cotton batting 8" long by 3" wide
Washable glue
snack size zip bag
Culinary bag
Cut a piece of 80/20 or 100% cotton batting 8" long by 3" wide. Turn the bag inside out. Squeeze a bead of washable glue along the sides and top of the bag below the string. Glue the batting to the bag. Allow the glue to dry. Turn the bag outside in. Pour powder into the bag and cinch it closed. You don't have to tie it. Store culinary chalk bags in a snack size zip bag. Keep a cup handy to rest the bag in while marking a quilt. Place a towel on the quilt to wipe powder off your hands. Hold the bag at the top and swipe over a stencil like you would a pounce. If you make a mistake, remove the residue with scotch tape and sweep away the lines with a lint brush. I'm really pleased with how well this works. I never run out of chalk.
DIY Chubby Marker
Zinc stearate
Melt the zinc stearate in a glass beaker on a candle warmer or in a very small bowl of hot water. Pour it into a bottle ice tray or a 10 ml centrifuge tube. Let the wax cure and harden. Remove from molds. Sharpen with a jumbo crayon or pencil sharpener. Save the shavings for making another pencil.
DIY Air & Water Erasable Marker
Disappearing ink is a water-based solution made from common pH indicators. Both thymolphthalein and phenolphthalein are acid–based pH indicators. Their transition range is at approximately pH = 9.3-10.5. These substances are usually colorless below this pH, but when mixed with sodium hydroxide (lye) which raises the pH, they turn into a blue or red/pink solution. This solution disappears, however, once the solution has been exposed to carbon dioxide in the air. This causes the pH level to drop below 10.5 which makes the color disappear.
Eye dropper or pipette
3 glass baby food jars
Freshwater aquarium or pool test kit.

From that kit, you'll be using the pH Test Solution (blue thymol), the High Range pH Test Solution (red phenol), and the Ammonia NH3/NH4 Test Solution (yellow lye).
In one jar, pour 100ml of distilled water. Add 20 drops of yellow solution. Place lid on and shake gently to combine. The yellow solution is lye so be careful with it. Label LYE and set aside.
In another jar, mix the following:
10 drops of blue or red solution
10ml ethanol (Everclear)
90ml distilled water
3ml lye solution
Pour 90 ml of distilled water into a jar. Add ethanol. Drop in the pH indicator and stir. It will become milky. Add the lye solution. The ink will change color. Put the lid on and shake.
If you want purple, use 5 drops of each blue and red. If you want white, leave out the pH solution. Lye will leave a white mark because it bleaches.
Transfer 8 ml to the marker. Store the remainder in the jar, labeled water erasable (blue) or air erasable (pink). The jar of lye solution can be stored also.
Test the ink on both a white and black piece of fabric. In a few seconds the mark will disappear. When it dries, it may leave a white mark on dark fabrics. It will wash out easily. To make the mark disappear faster, rub vinegar on it. If you want the mark to re-appear, rub ammonia on it.
DIY Heat Erasable Gel Pen Currently under research
Biphenyl is a developer and heat transfer agent that melts at 156.2 degrees F. It is insoluble in water, but soluble in organic solvents. It is responsible for the heat erasability. Purchase it on eBay for $25.95.
Phenol (carbolic acid) is an organic solvent. It is the active ingredient in chloraseptic. Other sources of phenol include: Thymol (from thyme, the active ingredient in Listerine), Wintergreen oil, Clove oil, Ingrown Toenail treatment, Campho-Phenique, Lysol, TCP Liquid Antiseptic, and Red pH indicator. Phenol is also used as a mold inhibitor in gesso and chalk grounds. It was once used in face soap as an exfoliator--the first chemical peel. Buy 90% Laboratory grade Phenol on eBay for $34.99.
Sodium Hydrosulfite is a solvent reducer, oxidizer, and color remover. It oxidizes at 185 degrees F. It is used in hair dye and as a cotton fabric bleach. It is responsible for the disappearing effect of the ink and for the white mark it leaves behind. Purchase from Dharma Trading for $7.84.
Thermochromic Pigment changes from color to colorless at 86 degrees F and returns to color after it cools. Purchase a 5 gram sample set of 5 colors from Solar Color Dust for $20.00. I recommend black, blue, dark blue, magenta, and yellow. Use zinc stearate for white.
Glass condiment cup
Disposable stirrer
Bulb syringe
Rubbing alcohol
Pliers
Empty gel pen tube
Remove the ink tube from a roller ball pen. With pliers, gently pull out the metal valve. Flush the tube with a bulb syringe and rubbing alcohol until the tube is clear. Carefully replace the valve. Suck ink into the syringe. Insert the needle into the ink tube. Hold the tube at an angle. Slowly push the ink into the tube, allowing air to escape. It shouldn't take much to fill it. Re-assemble the pen and write with it. Try it on paper first and then on a scrap piece of fabric. The aloe gel and alcohol should evaporate leaving only the pigment. Erase the mark with a hot iron or hair dryer.
White Gel Pen
Zinc stearate melts at 248-266 degrees Fahrenheit. The cotton setting on an iron is 390 degrees. However, it is only soluble in phenol (carbolic acid).
Glass condiment cup
Disposable stirrer
Bulb syringe
Rubbing alcohol
Pliers
Empty gel pen tube
1/2 tsp Aloe Gel
1 Drop Everclear or vodka
1 Drop Phenol
1/2 gram Zinc stearate
Dissolve zinc stearate in phenol. Microwave aloe gel in the glass cup for one minute or until it turns to liquid. Add dissolved zinc stearate to aloe. Stir in alcohol. Stir vigorously for two minutes. Let rest uncovered until completely cool.
Remove the ink tube from a roller ball pen. With pliers, gently pull out the metal valve. Flush the tube with a bulb syringe and rubbing alcohol until the tube is clear. Carefully replace the valve. Suck ink into the syringe. Insert the needle into the ink tube. Hold the tube at an angle. Slowly push the ink into the tube, allowing air to escape. It shouldn't take much to fill it. Re-assemble the pen and write with it. Try it on paper first and then on a scrap piece of fabric. The aloe gel and alcohol should evaporate leaving only the zinc stearate. Erase the mark with a hot iron or hair dryer.
Mark Remover
Castile soap or textile detergent will remove talc and pigment which is only permanent if it has been heat set.
Ammonia removes graphite pencil marks.
Colored chalk marking pencils are very difficult to remove because of the wax. If you do use them, the lines are somewhat removable with LA's AWESOME Cleaner and Degreaser which contains orange oil, ethoxylated alcohol, disodium salt, tetrasodium etidronate, sodium hydroxide, and water. This stuff will remove damn near anything! It's available at the Dollar General Store. Dr. Bronner's Citrus with extra orange oil may be a better alternative.
Not Marking

Smart Solve water soluble printer paper is the best product I've found for quilting lines and foundation blocks. The paper dissolves in 30 seconds. It's available in a 25 pack of 8.5x11" sheets for $11.50.


Printing
Marking intricate designs can take forever. Printing is a faster way of doing it for designs smaller than 8". All you need is an 8.5x11" sheet of tracing paper or Smart Solve. If all you have is a 9x12" tracing pad, you'll have to cut a 1/2" off of the width. A paper cutter can slice through several sheets. Count the number of sheets you need and tear them off at once, leaving the glue intact and trim it to size. Now, separate the individual sheets.
If you have a block stencil, separate the corners from the strips. Line up the 4 strips vertically and place the 4 corners at the bottom. In your image editor, select the line color and fill it with black or charcoal (#808080).
Use a washable glue stick and run a very light line along the top of a sheet of printer paper. If you see purple, you've applied too much. Adhere the tracing paper to the printer paper, making sure it's lined up. Don't bother with tape. You'll never get it perfectly straight and it will tear the paper. Feed the paper into the printer tray, tracing side down.
Print with settings: Plain Paper; Fast Draft, and Black Ink Only.
Cut out the pieces and align them on the block. Tape the corners to the strips and the paper to the fabric. Scotch tape can be stitched through, but it will dull a needle and cause skipped stitches. Do not use glue or tack adhesive on the paper! Stitches will hold it down. It actually stays in place while sewing. It will not come off until you remove it.
If you can't print it, place tracing paper over a design and secure with tape. The tape can be traced over. Blue tack adhesive will lift excess graphite without erasing the lines. Simply dab the lines and lift; don't swipe back and forth as you would with an eraser. There may be a bit of graphite transfer onto the thread or fabric, but it washes out easily. If this is a concern, use a Sewline pencil with colored lead.
No comments:
Post a Comment