
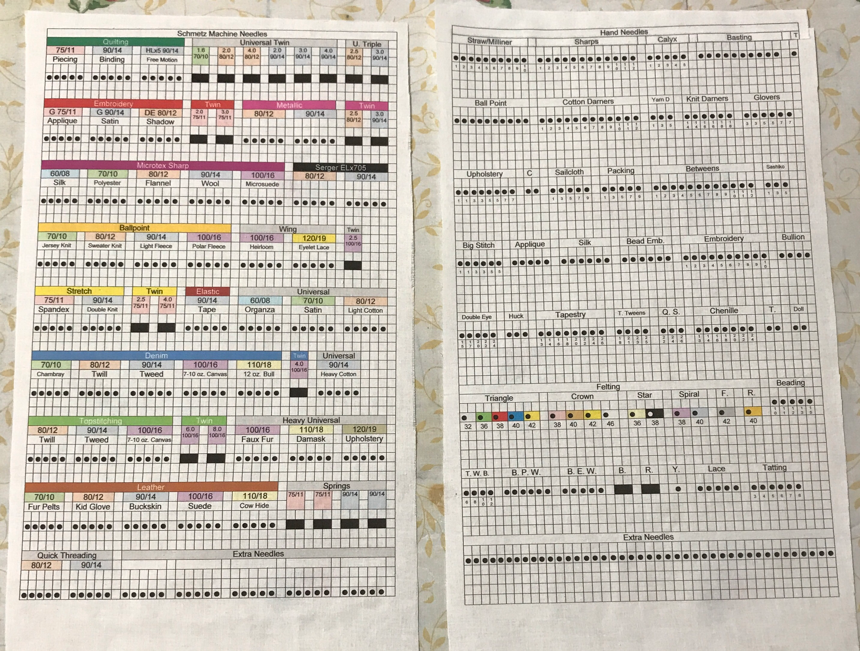
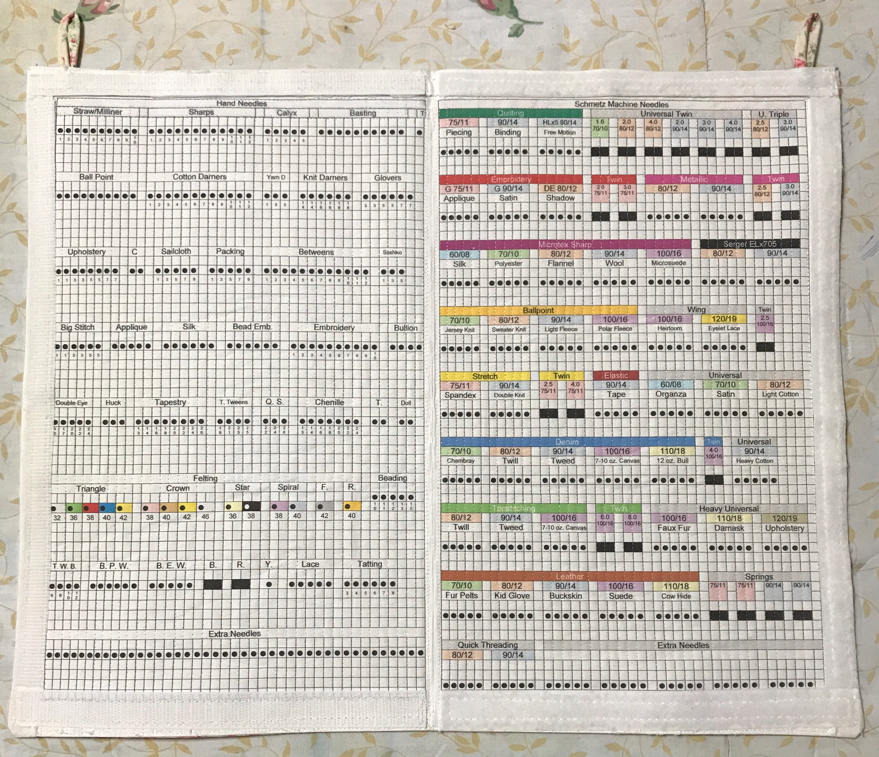
When the MyPad for Needles came out, I had to have it. When I got it, I didn't like it. It was too stiff and too small. Then, I thought, "why am I buying this crap if I can make everything I need?" I researched all of the Schmetz needles. I didn't bother with Organ or Klasse needles because I assume they're basically the same as Schmetz and my local Walmart doesn't sell those brands. I also researched hand needles because I had a variety of them I couldn't identify otherwise. I used MS Word to make the 1/4" grid and filled it in with needle types, sizes, and what they're used for. I even color coded them to match Schmetz colors, with a few exceptions (60/8, 100/18, and 120/19 are my own colors). I included all but taxidermy and wig weaving needles in the hand needle organizer because these are specialized crafts that I assume the average sewist would not pursue.
Download the following PDF files.


Cut four 9x15" sheets of white muslin fabric for each inventory. Two of them are for the back, which can be a different fabric.

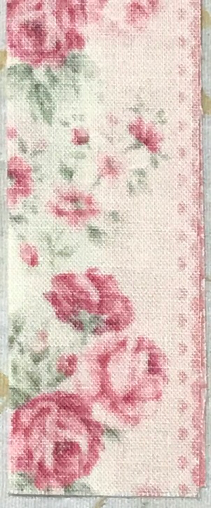
If you want to make a book, cut the backing fabric 17-3/4x14-1/2". This is a great project for vertical stripe fabric.

Cut two pieces of cotton or cotton/poly batting 7-1/4x12-1/4".

Dilute Matte Digital Ground 1:1 (1 oz ground & 1 oz water). Wash fabric in textile detergent to remove sizing. Rinse and blow dry. Lay fabric on a piece of plastic. Coat the fabric with ground until it is saturated. Blow dry. Snip frayed threads. Lay freezer paper on the back of the fabric. Iron the paper side to heat set. Trim to 8.5x14". Place in printer tray, fabric side down.
Print with settings: 8.5x14", Narrow Margins, Plain Paper, Color, Normal. Blow dry the ink and heat set. Coat with Liquitex varnish and don't wash them.
You can sew each inventory separately or together as a book. I used a clear view foot and a 75/11 needle with 50 wt thread for most of this project.


To make a book, sew the two printed pieces together, right sides facing with a scant 1/4" seam and press the seam open.


Add fabric to the sides and top with a scant 1/8" seam. Trim the entire piece down to 1" from the outside black line to square it.

Turn the top of the printed fabric and backing over 1/4". Glue down and heat set.

Lay a bead of glue down the center of the outside squares on the back of the printed fabric, top and sides. Don't glue the bottom. Lay the batting on top and heat set. Do not use the gelatin spray because it will cause the ink to bleed. Basting tack spray might gum up the needles.
You may sew hanging loops to the backing fabric. To make hanging loops, cut a 2-1/4x8-1/4" wide strip of backing fabric. Fold in half lengthwise, right sides facing.


Spray with stabilizer and blot the excess with a cotton ball. Heat set to stiffen.

Sew 1/2" from the folded edge.

Cut 1/8" to the right of the sew line.

Open the seam down the center of the tube. Spritz with water and heat set.

Because cotton is a thicker fabric than satin, it's harder to turn. I have a trick for turning cotton tubes. Insert a small safety pin through the side opposite the seam.
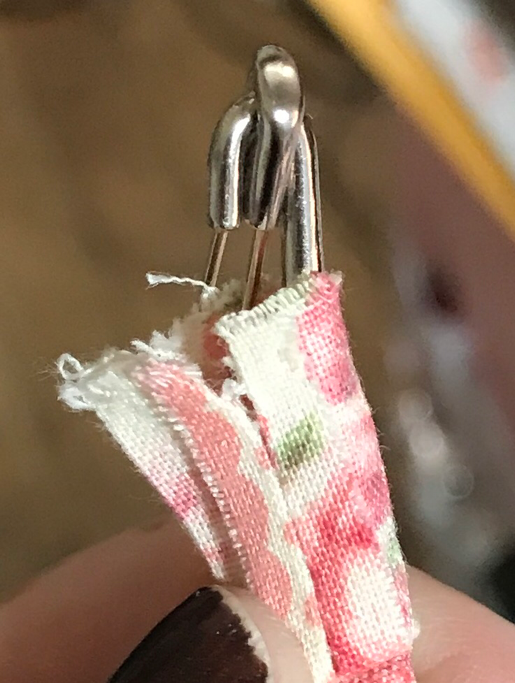
Insert a loop turner into the tube. Hook the eye at he top of the safety pin. Spritz the fabric with water to soften.

Pull the safety pin down inside the tube. Push the fabric up the pin. Pull the safety pin through the tube while turning it inside out. You have to fiddle with it to get it started, but it works.


Press the tube with the seam down the center. Sew down 1/8" to the right of the seam. Fold in half and sew again as close to the edge as possible.
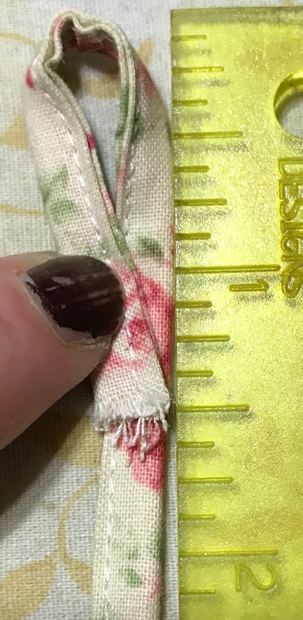
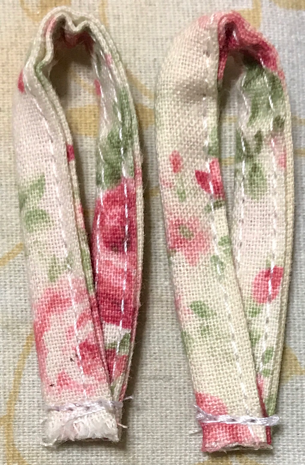
Fold the tube into a 1-1/2" loop. Glue the end to the tube and heat set. Sew the ends together (forward, backstitch, forward, backstitch, and forward again). Cut the loop from the tube. Repeat to make another loop.


Position the loops so the threads on the loop meet the bottom of the backing fold. Glue and heat set into place 1" from the edge. Sew the loops onto the backing, backstitching twice as before.


Place the backing fabric on the printed fabric, right sides together. Sew the sides and bottom together with a 1/4" piecing foot. Snip off the corners at a 45 degree angle.

Turn inside out and push the corners out. Push the seams out and press to get them even. Handle the batting as little as possible.

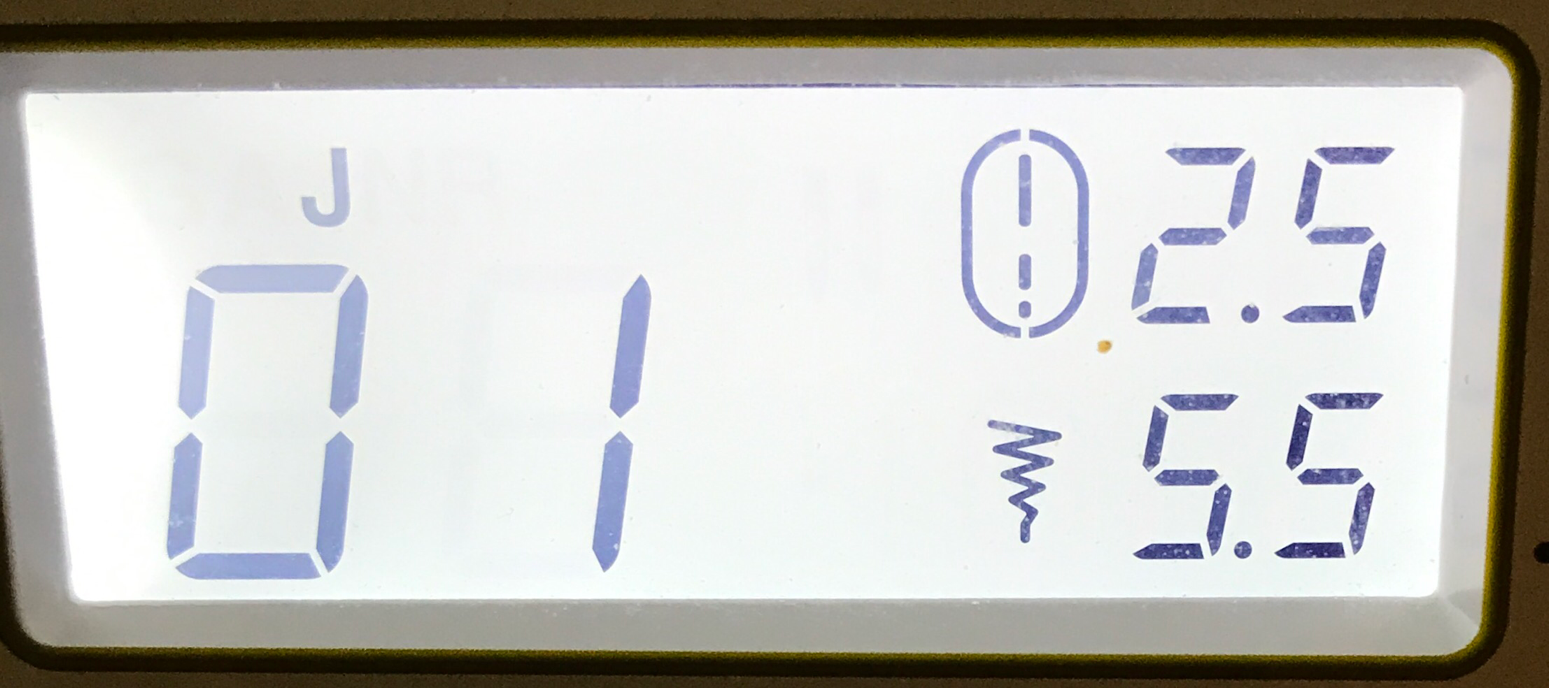

Sew the top together using a clear view foot and a 5.5 width.


Secure both sides of the center seam with the clear view foot and a 6.5 width.

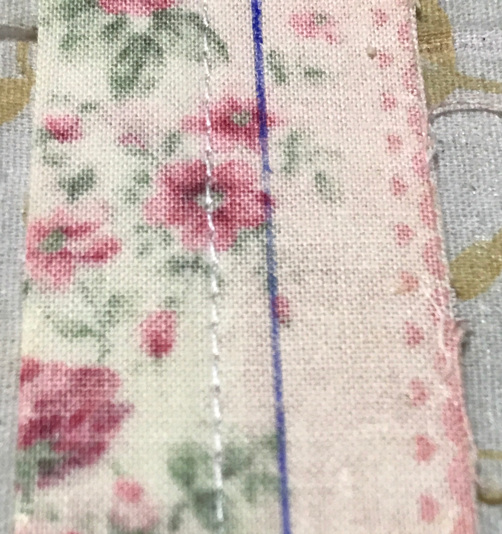
Top stitch over the vertical lines with clear poly thread and a 70/10 microtex sharp needle and 2.5 length and 3.5 width, top tension set to 3 to create needle pockets. You can see the real beauty of a clear view foot. The inside edges of the foot touch the lines while the needle is perfectly centered over the line you're sewing. I made the grid spaced 1/4". It's mistake proof.


Sew all the way to the bottom. Pivot, take 2 stitches. Pivot again and sew back up to the top, stopping at the black line above the colored row. Pivot and take 2 stitches like before and sew to the bottom. You'll have to bend the pages and wrestle with them a little, but it gets easier. Repeat on the hand needle side.

When you're finished, sew across all four sides. This secures the batting and keeps the needles in place.

On the hand needle side, I worked around the felting needles, bodkin, rafia, and big yarn needles.

Velcro is optional, but handy if you need to take your needles with you.

Stick the velcro together first. Cut two 8-1/2" long and one 12-1/4" long.

I had to trim 1/4" off the top strip and 1/8" off the side strip because they were too wide. It's best to do this with really sharp scissors while they're stuck together. Heat the velcro strips with an iron to smooth and flatten them.

You can use Heat n' Bond super strength hem tape or sew it. You can even do both, if you want. The hem tape will keep it in place while you sew. Cut off 6 strips of hem tape to match the length of your velcro and trim it to the right width, if necessary.

Heat the printed fabric with an iron. Place a strip of hem tape, texture side down on the fabric and hand press it in place.

Heat the velcro strip again and place it over the hem tape, loop side down. Hold down the velcro and heat it with an iron, working across the velcro. This will lightly melt the tape. Turn the organizer over and heat the fabric side until the tape is completely melted. Flip it back over and allow to cool. Repeat for the other two strips.

On the opposite side, heat the fabric in small sections and press the tape like before. Fold the organizer together and heat the fabric. Lift the fabric occasionally to make sure it has bonded. I had to let my iron rest on each section for 5 minutes. Allow to cool completely. Carefully separate the velcro.

If you want to sew it, switch to a 90/14 needle and 35 wt thread, any color in top and bobbin (I used white in the top and pink in the bobbin) with normal tension and a stitch length of 4.0.
Sew both sides, top and bottom all the way around.

I love having all of my needles in one place! I keep it behind my sewing machine.
Would a pdf file be available?
ReplyDeleteI have updated the links. Thank you for commenting.
DeleteThank you!! I love it!
DeleteYou're very welcome. It's one of my favorites.
DeleteWould you be willing to sell/ship the fabric version of this? Wouldn't like to buy the materials to glue and iron myself but would love to buy the Muslim stained like this to sew into my own book. vanessanpeacock@gmail.com
ReplyDeleteI'd love to, but I don't have the time or space right now. Thanks for asking.
DeleteThanks for sharing such a detailed project! After printing the pages your instructions say to coat with varnish. My first thought was nail varnish (polish) or wood varnish and that can’t be right, can it? Would you please share the product you use? Thanks again!
ReplyDeleteI use Liquitex Varnish to seal inkjet prints that I do not intend to wash. Look on the menu to the left of the page. Scroll down to Fabric Painting Series. Click on Acrylic Mediums. The Liquitex Varnish is at the bottom. I buy it online from Blick Art.
DeleteDas Nadelbuch gefällt mir sehr sehr gut. Das werde ich für meine Tochter, für meine Schwiegertochter und für mich auch nähen. Für meine Hand-Nähnadeln habe ich ein separates kleines Nadelbuch, um dort meine Jersey-Nadeln aufzubewahren - das genügt für mich.
ReplyDeleteSorry, dass ich auf deutsch schreibe (mein Englisch ist sehr schlecht).
English Translation: "I really like the needle book. I'll be sewing it for my daughter, my daughter-in-law, and myself. I have a separate small needle book for my hand sewing needles, which I use to store my jersey needles—that's enough for me. Sorry for writing in German (my English is very poor)."
DeleteDanke, mein deutscher Freund. GenieBen Sie Ihr Nadelbuch. (Thank you my German friend. Enjoy your needle book.)