

The Spoon or Glide foot is intended for free motion quilting.

1/4" Ruler foot is for free motion quilting with templates.


Echo Quilting foot is for evenly spaced 1/4, 3/8 and 5/8" free motion echo quilting. The Pfaff/Husqvarna and Stitcher's Dream models are the best ones.

The Brother/Distinctive Echo foot is terrible. There is so much pressure on it, that I couldn't move a quilt beneath it. See my tutorial for how I modified it to make it adjustable.

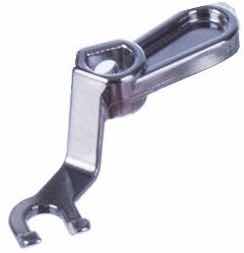
Micro Stippling feet are intended for quilting at 1/8" intervals on a long arm machine. The closed toe is also referred to as a Trapunto foot.


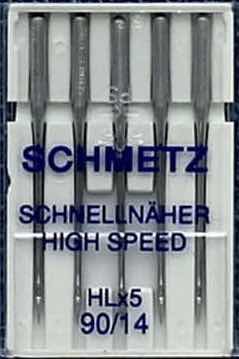
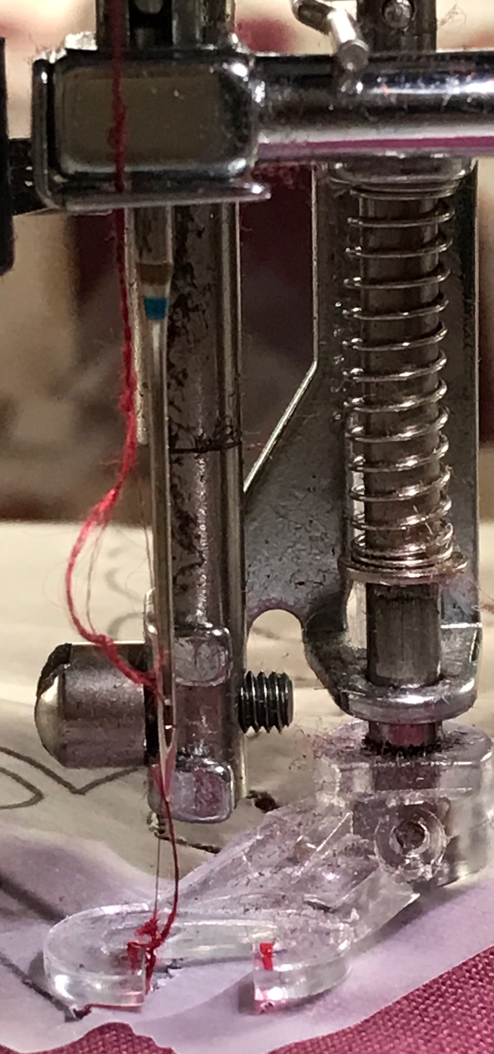
The needle I use for free motion work is a Schmetz High Speed HL 90/14. It's a multi-directional needle designed for free motion quilting. It has a special scarf that prevents skipped stitches.
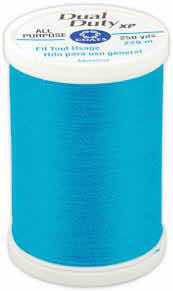
My favorite thread to quilt with is 35 weight Coats & Clark All Purpose or Dual Duty XP thread because of its vast selection of colors. It's moderately visible so it stands out as much as it blends in. For straight stitching and appliqué, I set my top tension to 4. For FMQ, I set my top tension to 7 when pairing it with 70 weight bobbin thread.

I use YLI Silk Filament thread with a Microtex Sharp 60/8 needle and top tension set to 3 for thread painting.
 I use clear polyester in the top and bobbin with a Microtex Sharp 70/10 needle and top tension set to 3 when I want my stitches to be invisible across a multi color pattern.
70 weight bobbin thread really buries into the fabric making it almost invisible. The right thread tension is important when using it. I set my top tension to 7 and it works perfectly with 35 weight thread.


I also use a Bobbin Genie--a teflon disc inserted into the bobbin case, and Sewer's Aid silicone lubricant on my thread.
 |
 |
| Using clear polyester | Using Dual Duty XP |
Ease of Movement


It's good to have a little bit of tension on the quilt, but drag and weight will stop your sewing. If your work area is too slick, you will loose control. You don't need a vinyl cover or car wax on your machine bed. Don't bother with the Gypsy fabric glide gripper, quilt halo, or octi-hoop. Use your hands with machine gloves or gardening gloves. They have silicone grips on the palms and fingers. The machine gloves range in size from extra small to extra large. Tippi Micro Gel Fingertip Grips available at office supply stores are another option. They range in sizes from 3-11. They're also perfect for hand needlework.

Gloves in a Bottle is a new shielding lotion that locks in moisture while providing grip that is especially useful for working with silk. Get it from Sew What Quilt Shop for $5.95.
Do not put any pressure on the quilt. This is a mistake often made by quilters trying to control their stitches. Let the gloves grip the top fabric and the quilt will glide easily. When stitching around letters, appliqués or embroidery, bunch up the quilt a little around the needle to give yourself some slack. Move the quilt around the needle with your fingers. Use your hands to move the quilt when stitching long lines. Don't be afraid to stop and start. Your stitches may not always be on the lines, but no one will know after the lines are removed.
Locking Stitches

Do not use your machine's stitch lock function or hold your quilt in one place too long with the feed dogs lowered. That will cause a big knot on the back. Hold your thread with one hand and make no more than three stitches with the hand wheel and then, start sewing. Running the needle over the start and end once or twice will secure the stitches enough that the tails can be knotted and buried.
Stitch Uniformity

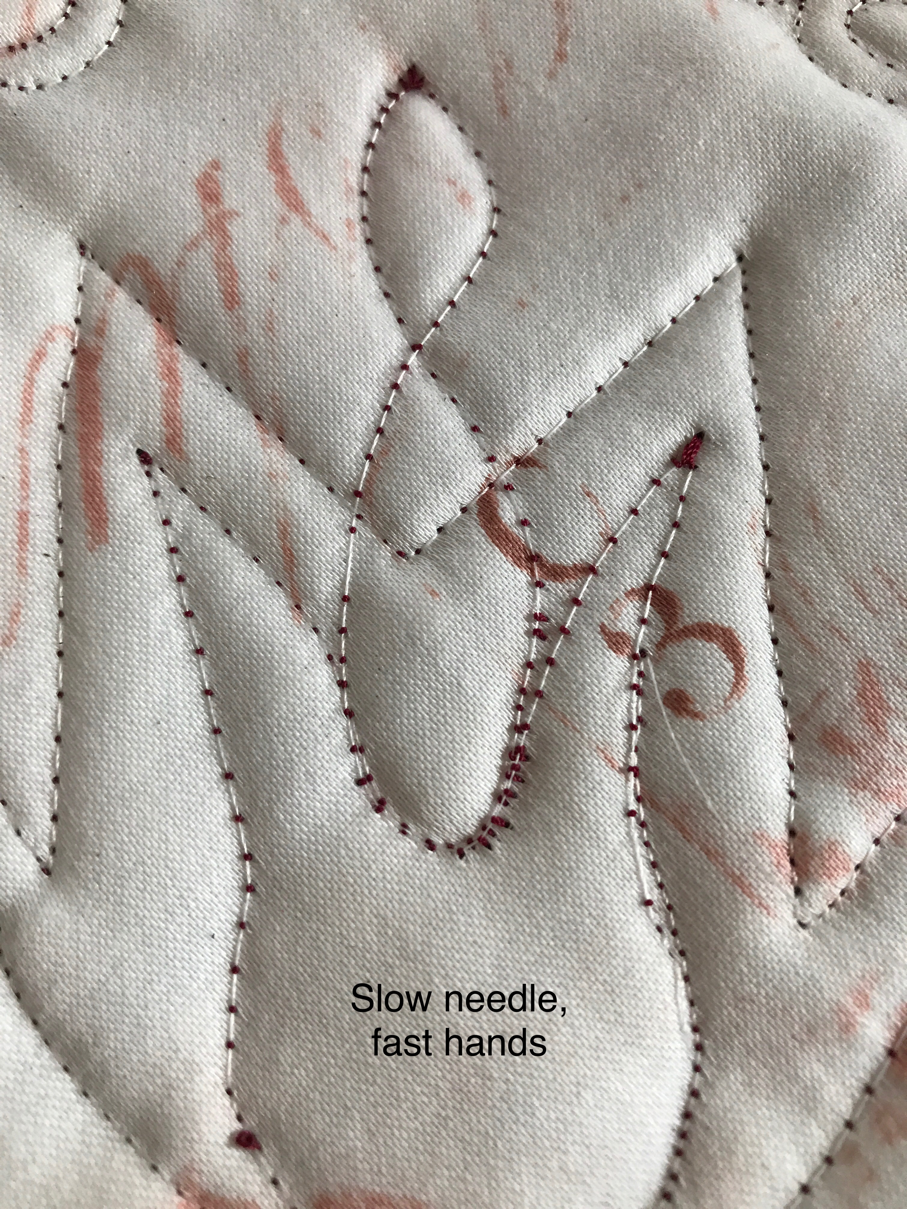

Moving your hands faster than the needle creates long irregular loose stitches. Moving your hands slower than the needle creates tight uniform stitches that will bury into the fabric.

If you do it right, the entire back should look like this. Watch this video closely and you'll see what I mean by rhythm.

This is what happens when you move your hands too fast trying to keep up with the needle speed. You'll bend the needle. Keep your eyes focused on the lines. Ignore the needle and move your hands slowly.
Skipped Stitches

A bulky seam will cause skipped stitches as well. If you pay attention, skipped stitches are a precursor to a break. This reinforces my argument for pressing seams open for free motion quilting. The alternative is to use a 100/16 or larger needle.
Thread Sheredding and Breakage
If the top thread breaks, it's because you're moving your hands too slow and the needle is cutting the thread. Cut the top thread, remove it and pull out 6 inches. Cut it again and re-thread it. You might notice that I'm using an open toe hopping foot. I realized later this was a mistake.
Thread Jam

It happens to all of us. You're quilting along and, all of a sudden, your top thread gets caught in the shuttle race.

Lint is the number one cause of thread jams. It may also be caused by a dull needle pushing the fabric down into the feed dogs. A low or improperly wound bobbin can cause it too.


Change or sharpen your needle and change your straight stitch plate to a darning plate for free motion quilting. You could also use a feed dog cover or tape a piece of heavy cardstock over the stitch plate.
Cut the thread and pull it out. Remove the bobbin and shuttle race and blast the lint and dirt out with canned air. Put it all back together. Turn off the machine and turn it back on to clear the error message. Re-thread the top and pull your bobbin thread up through the needle plate. Test on a scrap quilt sandwich. Follow this procedure for every thread jam.
Tension Problems

Not enough tension also causes loose and skipped stitches. This problem wasn't caused by thread tension. Thread tension is relative to the feed dogs and has no effect when they're lowered. Having the feed dogs lowered means the tension required for even stitching has to come from somewhere else. It was caused by the batting or fabric not being thick enough. I can't adjust the feed dog height on my Brother SQ9185. I assumed that dropping the feed dogs was the only necessity. I was wrong. This happened because there was not enough space between the top and bobbin threads to create tension between them. This batik fabric was thinner than the solid and floral fabrics I used in the blocks where the problem didn't occur. The border fabric I used was also thin and caused this problem. My batting was 80/20 which is 1/8" thick. I learned that the batting has to be no thinner than a 1/4" regardless of the fabric used. My machine limitations and lack of tension understanding was the chief cause of this problem. Thick fabric with thin batting is okay. Thin fabric requires 1/4-1/2" thick batting. That's the rule.
Needle Stops Moving
If your needle stops moving and it's stuck, turn off the machine and unplug it. Pry it loose if possible. The needle arm is dry and needs to be oiled. It's assumed that these new plastic cased computerized machines don't require oil, but that isn't true. Remove the deep set screw from the back of the case behind the needle arm cover. The old machines are hinged to make oiling easier. Move the hand wheel until you see a round black piece on the needle arm. Drip a few drops of oil in this hole and a few drops on the needle arm where it exits the case. Move the hand wheel in both directions until it loosens up. Give it a good cleaning at this point. Put the cover back on and plug in the machine. Run the machine without the needle to make sure it's well lubricated. Put it all back together and re-thread the machine. Test it on a scrap sandwich. Clean up any residual oil so it doesn’t transfer to your fabric.
Tying Off
This is the same method used for hand quilting.

Leave about 5 inches of thread when you start and stop. Thread both ends through a needle.

Thread a needle with both tails. Wrap the tails around the end of the needle three times.

Insert the needle into the fabric and batting.

Pull the needle out and the knot will be buried beneath the fabric. Cut the thread close to the fabric. You could also tie two square knots with the threads separated. Thread a needle and bury the threads.
Quilting Space

Equally important is how your quilting area is set up. Quilting doesn't depend as much on having a lot of space as it does having enough support for the quilt and having your supplies within easy reach. You can see my quilting frame in front of my sewing machine. It has a cutting board covered with an ironing blanket on top of it. It supports half of the quilt in front of me. My rolling quilt frame doesn't work with a small home machine so I use it to support a quilt to the right of me. I have a small table to the left for my thread stand, bobbin winder, basting pins, quilting gloves, and silicone thread lubricant. I love the thread stand. I tend to use more than one thread color and it saves me time. I don't have to load a spool on the machine every time I want to change thread. I made pocket organizers for my machine and quilt frame/cutting board as well so the supplies I use most often are within easy reach. As you can see, I don't have a lot of space or a fancy expensive sewing cabinet. That's a full size quilt I'm working on and I didn't have a problem managing it.
Posture, comfort, and rest are also important. There is a lot of muscle, joint, and eye strain involved in free motion quilting. Your hands, wrists, back, shoulders, neck, and legs will all hurt simultaneously. Not to mention, you'll go cross eyed after so many hours of quilting. When that happens and you're feeling the strain and fatigue, take a break. I can work for 10 hours on a quilt with short breaks, but my body is accustomed to the strain. Quilting is hard work. It takes dedication and perseverance to finish even a small project. Quilting for me, is a full time job that requires a committed work ethic. It isn't a fun hobby that I jumped into on a whim. It has taken me eight years to hone my skills and purchase the right tools or make my own equipment to get to where I am now and I'm finally quilting professionally out of my home.
No comments:
Post a Comment