

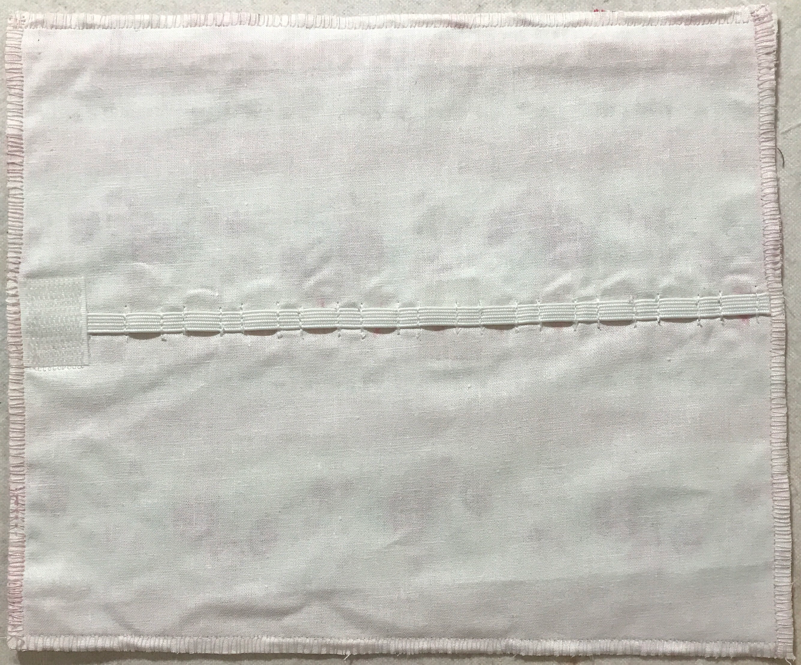
The pencil roll can be made to any length and the eleastic modified to accommodate thicker pencils, pens, markers, art brushes, makeup brushes, makeup itself, paint tubes and bottles, crochet hooks or knitting needles. You name it. You can make an entire art portfolio with just fabric, elastic and velcro. It's easy to make. This is a great stash busting project and a good one for learning to sew.
Materials
2 pieces of fabric, 7-1/4" wide x custom length

3/4" wide velcro, 1" long piece

Heat n' Bond Super Strength hem tape, (2) 1" long pieces

1/4" wide elastic tape, uncut
50 wt. Piecing thread
35 wt. All Purpose thread (C&C Dual Duty XP)
80/12 Universal needle
Flat Sole foot
Overcasting foot
1/4" Ruler
Heat erasable pen
Elmer's washable glue
Clover mini iron with slim tip
Paper, pencil, ruler, scotch tape, scissors

Start by planning your project on paper. This is especially important for spacing different size objects that will be held in place by the elastic. Measure and mark at least 1/4" of space in between each object. Larger objects will need more space to collapse on one another when rolled up. Colored pencils are 3/8" wide with a 1/4" of space between them.

Mark the velcro 1/4" from the left side. Use scotch tape to hold the objects in place. Roll up the paper to see if it collapses.

Add 1/16" to the right of the last mark. Add a 1/4" seam allowance. Measure the length from the left edge of the paper to the last mark. This is the length to cut your fabric. Mine came to 7-1/4".

Mark the elastic the same way you marked the paper, including where the velcro will be on the left. Add 1/4" after the last line. Cut the elastic on this line. Set aside.
Velcro and Elastic Placement

Each cut of fabric has a different center. Fold the fabric in half lengthwise. Mark the center. Place the 1/2" mark of a ruler adjacent to this center mark. Place the long end of the velcro adjacent to the 1" mark on the ruler. Mark the fabric at each end of the velcro.

Place the end of the elastic strip between the two marks 1/4" away from the edge. Glue baste the elastic into place.

Place the hem tape on top of the elastic and the velcro on top of the hem tape, hook side down 1/4" from the edge. Hold the layers together. Turn the fabric over and heat set the hem tape. Allow the hem tape to cool completely. Leave the velcro stuck together.

Butt the elastic up against a ruler to straighten it and mark the fabric opposite the elastic. This will help you keep the elastic straight as you sew.

Place a bit of glue on a 1/4" of space on the end of the elastic and heat set.
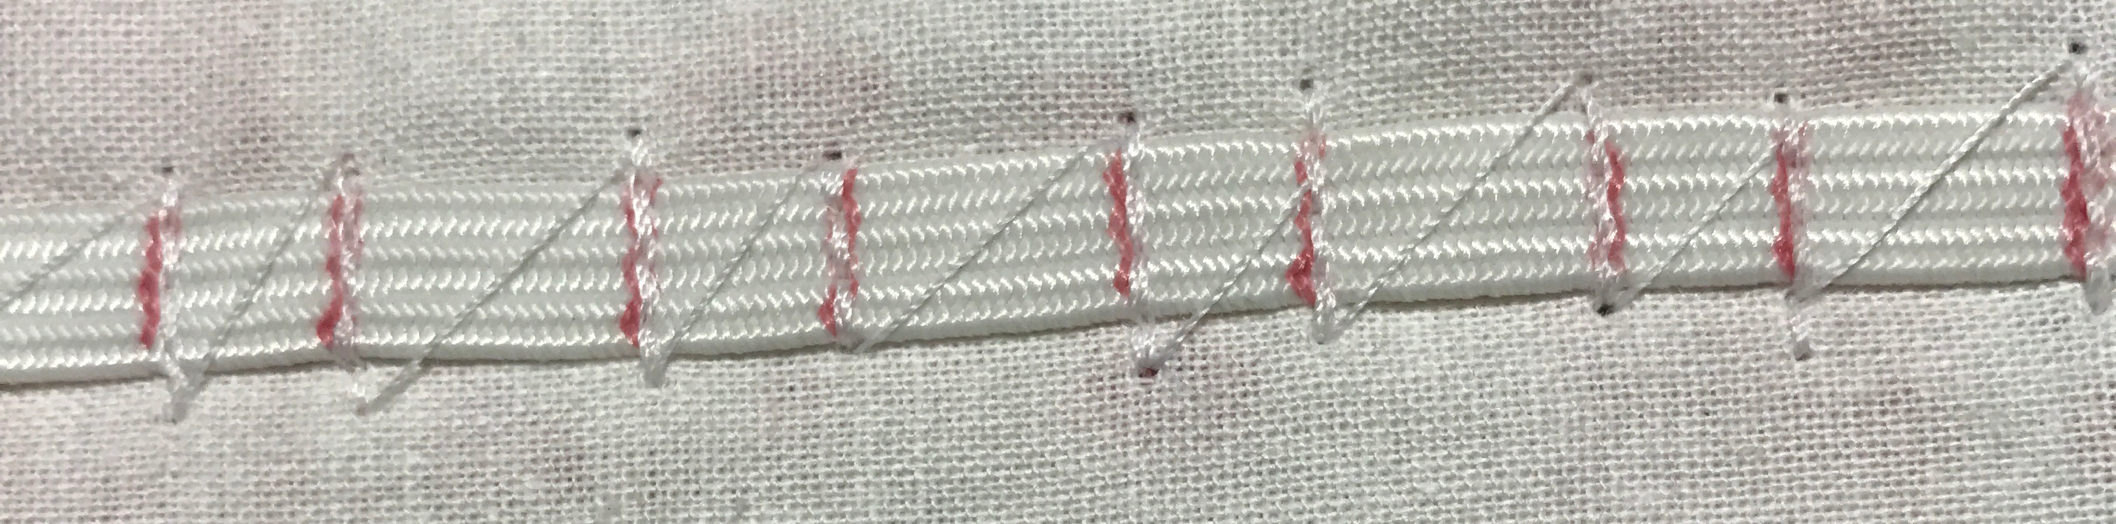
Use 35 wt. thread with an 80/12 Universal needle and a Flat Sole foot. Sew, back stitch, and sew again (3 passes) over the marks. Lift the needle and presser foot. Move to the top of the next mark and continue. The elastic will stretch a bit. When you get to the end, detach the elastic and continue. Sew down the end piece as well. Spread a drop of Fray Check over the stitches front and back. Snip the jump stitches when you're done. Snip the piece of elastic extending passed the seam.
Opposite Velcro
Attach the loop part of the velcro after the edge is finished.

Place your pencils in the slots of the elastic and roll them up. Mark the ends where the velcro touches the fabric. Unroll it and remove the pencils.

Remove the loop side of the velcro and place it with the hem tape on the fabric to the right side of the line between the two marks. Iron in place like before.
Overcasting Instructions

Use an Overcasting foot with an overcast stitch (06 on my Brother machine), a stitch length of 1.2 and a stitch width of 5.0. Back stitch straight at the beginning and end.

This method produces a finished edge with no bulk.


No comments:
Post a Comment