
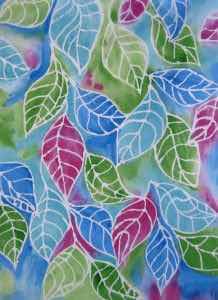
My personal favorites are Illusions Allover, Illusions Blender, VIP Blenders, Fabric Palette, and Creative Cuts. I love anything that reminds me of parchment paper or tanned animal hide, and anything with vines or leaves. It's a reflection of my love for writing and the natural world. I also like damask and scroll work.
I have a couple of books on surface design. I'll be experimenting with the techniques covered in these books to try and duplicate my favorite fabrics. My books recommend using: Liquitex Soft Body acrylic, Liquitex Textile Ink, Derwent Inktense sticks, and Shiva Paint sticks. I won't be using any of these. I'll be using Folk Art or Apple Barrel craft acrylic and homemade pigment ink.
Materials:
Acrylic Paint in matte and metallic colors
Pigment Ink
Oil paint sticks
2oz mister
Pipettes
Mixing spatulaMixing palette
Hinged lid paint cups for mixing
Small plastic bowl
Flat Natural brush 2"
Flat Acrylic Wash brush (3/4 or 1")Stencil brushes (2, 4, 6, 1/8, 1/4, 1")
Foam brush (1")
Foam Pouncer (3/4, 1-1/4")
Sea sponge
Scratch Foam sheetFoam stamps
Rubber stamps
Objects, found or bought
Rubbing plates
Grip mat
Brayer
Styrofoam plate
Icing Combs
Silicone Catalyst Blades
Sea Salt
Bowl of water with detergent
Soak fabric in textile detergent to remove sizing and let dry. If you mix colors, don't forget to write down your formulas. When fabrics dry, they'll be lighter than they appear wet. *Heat set fabric with an iron when it's dry.
Silicone Catalyst Blades
Sea Salt
Bowl of water with detergent
Bowl of clean water
Paper towel
Roll plastic
100% Cotton FabricSoak fabric in textile detergent to remove sizing and let dry. If you mix colors, don't forget to write down your formulas. When fabrics dry, they'll be lighter than they appear wet. *Heat set fabric with an iron when it's dry.
*Let dry and heat set. Wash in hot textile detergent and washing soda. Rub the fabric between your hands or on a wash board to remove the polymer and soften the fabric. Rinse in cool water. Let dry and iron smooth.


 Sprayed: Start with a light dry solid. Fill a mister with paint diluted with airbrush medium. Spray the areas you want painted, leaving some areas unpainted. Repeat with as many colors as you like to create a blended effect. *


Acrylic Paint or textile paint


Versa Craft stamp pad


Solids
Single Color: Pour a cup of water into a plastic bowl. Add one teaspoon of paint to water and stir. Apply to fabric with a foam brush. For more saturated color, start with wet fabric and apply undiluted paint with a wet foam brush.*
Ombré: Spray the fabric with water. Mix two or more colors in separate containers and apply each color in a planned or random pattern. *
Blender: Start with wet fabric. Pour water into a palette well. Add 2-3 drops of paint. Using a brush, dot paint onto the fabric and swirl the paint around until it loses color. The fabric will be most saturated where the brush first touches. Blend with a dry foam brush. Pick up excess water and paint with a kleenex. Repeat with the same color for added saturation or with other colors.*
Batiks
Crackle Batik: Start with dry fabric. Pin the fabric to a sheet of styrofoam. Mix 1 cup of flour with 1 cup of water. Whisk until smooth. Spread evenly over fabric with an offset icing spatula and allow to dry. The fabric will try to shrink and distort. Scrunch the fabric to crack the paste. Watery paint works best for this technique. Use a sponge brush to apply paint over the paste, pushing the paint into the cracks. Any color can be used and more than one color can be applied. Allow to dry. Take the fabric outside and remove paste.*
Crackle Resist Batik: Start with dry fabric. Pin the fabric to a sheet of styrofoam. Mix 1/2 cup of flour with 1/2 cup of water. Add 1 teaspoon of alum. Whisk until smooth. Apply with an icing bag. Different tips result in different patterns. The fabric will try to shrink and distort. Scrunch the fabric to crack the paste. Watery paint works best for this technique. Use a sponge brush or spray mister to apply paint over the paste. Allow to dry. Any color can be used and more than one color can be applied. More paste can be applied also as a resist for the color beneath it. Take the fabric outside and remove paste.*
Texture Resist Batik: Start with dry fabric. Pin the fabric to a sheet of styrofoam. Apply light corn syrup by squeezing from the bottle, with boar bristle brush or stamp. Allow syrup to dry for 7-14 days or leave it wet. Wet syrup results in a softer texture. Do not let the fabric touch itself. Watery paint works best for this technique. Use a sponge brush or spray mister to apply paint over the syrup. Allow to dry. Any color can be used and more than one color can be applied. Soak in warm water 10-15 minutes and dry.*
Smooth Pattern Resist Batik: Start with dry fabric. Pin the fabric to a sheet of styrofoam. Draw or trace a design on fabric, or use a stencil. Mix 1/4 cup of toothpaste with 1/4 cup of aloe gel. Stir until smooth. Apply with a squeeze bottle. Allow the paste to dry. Watery paint works best for this technique. Use a sponge brush or spray mister to apply paint over the paste. Allow to dry. Any color can be used and more than one color can be applied. Take the fabric outside and remove paste.* Blue gel glue is too hard to wash out of fabric. That method is best reserved for paper.
Textures

Denim: Start with a dry solid. Apply a second color very close in shade with a flat object like a credit card by scraping the color across the fabric, revealing most of the color beneath it. *


Sponge: Start with a wet solid. Apply a second color with a natural sponge. Rotate the sponge to avoid a repeating pattern. *


Parchment: Start with a light wet solid. Apply a second darker color with a sponge pouncer. Rotate the pouncer to avoid a repeating pattern. *

Animal Hide (brown tones): Start with dry fabric. Apply a dark wash with a foam sponge. Blot off the color with a crumpled paper towel. *

Papyrus: Start with a wet solid. Apply a second color by dragging a 2" natural dry brush with paint horizontally across the fabric, leaving a thin uneven layer of color. Repeat vertically. *
Sun Printing: Mix 3 parts water to 1 part paint. Spray fabric lightly with water to dampen. Apply paint to the dampened fabric with a foam brush. Either place objects on the fabric or scrunch it to create areas of light and dark. Make sure the object edges are firmly in touch with the fabric, or you'll get blurry edges. Place fabric in direct sunlight. Bright, clear warm days yield the best sun prints. Remove objects and iron out the creases. *
Salt Printing: Randomly toss sea salt on damp painted fabric. Place in direct sunlight. Can be used with sun printing above. Brush off remaining salt. *
Abstract
Sprayed: Start with dry fabric. Spray a wash of color with a high viscosity spray bottle. The size of droplets will determine the pattern. *
Splattered: Start with dry fabric. Load a dry brush with paint and flick the brush with your thumb for small splatters or your wrist for large splatters.*
Diffused Lines: Spray fabric with water. Dip or load a marker pen with ink. Draw lines across fabric in a planned or random pattern. *
Brush Strokes: Start with a wet solid. Apply a second color by dragging a dry brush with paint across the fabric, leaving a thin uneven layer of color. *
Plate Printing
Subtractive: Add a small amount of retarder medium to paint to slow drying. Apply a thin layer of paint with a foam brush or roller to an acrylic sheet, covering the entire sheet. Use combs, stamps, etc to remove some of the paint in a pattern. Carefully place fabric on the plate. Cover the fabric with a piece of paper. Using a rolling pin or brayer, apply even pressure over the surface to transfer the paint from the plate to the fabric. Slowly peel the fabric off the plate and let dry. The plate can be repainted or washed and new colors applied. *
Additive: Add a small amount of retarder medium to paint to slow drying. Draw or print your design on a piece of paper. Place the acrylic sheet on the paper. A light table is useful. Paint the design on the acrylic sheet. Carefully place fabric on the plate. Cover the fabric with a piece of paper. Using a rolling pin or brayer, apply even pressure over the surface to transfer the paint from the plate to the fabric. Slowly peel the fabric off the plate and let dry. The plate can be repainted or washed and new colors applied. *
Rubbing: Spray rubbing plate lightly with tack adhesive. Place rubbing plate on a grip mat. Remove the film from the long side of an oil stick. Apply paint to fabric in one long stroke. More than one color can be applied. The fabric can be lifted and rotated to create a random pattern. Heat set only.
Stamping
Foam Stamp Method

Materials:
Acrylic Paint or textile paint
Water
One small mixing cup
Liquitex Fabric Medium
3/4" sable wash brush
Foam Stamp

Mix acrylic paint 1:1 with fabric medium. Liberally brush a small amount of paint onto the stamp. Work quickly. Don't worry about excess paint dripping down the edges. Place the stamp onto the fabric and press gently. Do not rock or wiggle the stamp. Lift stamp immediately to remove.
Pick up excess paint with the brush, apply it to the stamp, and press again on a different area.

Allow stamped fabric to air dry for 15 minutes. Place fabric, wrong side up on newspaper. Heat set with an iron. Tacky paint blobs will stick to the newspaper and come off. Those that don't give the print character. *
Rubber Stamp Method
Materials:
Versa Craft stamp pad
Rubber Stamp
Stamp cleaner
Stamp cleaner is a combination of glycerin, water, and baby shampoo. To recondition dry stamps, sponge glycerin on them and leave overnight. Wash with stamp cleaner.

Versa Craft pads and ink are available from Soft Expressions. Stamps and stencils are available from Scrapbooking Warehouse. Pick stamps with clear, defined lines and high relief. Work on a hard level surface.
Place stamp onto ink pad or vice versa. Press stamp firmly onto fabric and lift up. Allow to dry and heat set with an iron.

You aren't limited to using one color. The inks blend together. Use a dropper or sprayer to fill a blank pad with three colors to create a color scheme.

There is also a water erasable stamp pad for stamping embroidery designs. Also available from Scrapbooking Warehouse.
DIY Rubber Stamp
Start with a printed line object. Place an acrylic block over the sheet. Go over the lines with silicone caulk and allow it to cure. You'll have a clear rubber stamp.
Block Printing: Draw a design onto scratch foam. Carve it out with a stiletto or finger nail file. Paint areas with different colors (for allover prints or calico) or apply one color with a brayer. Place block onto fabric and apply firm even pressure. Lift off carefully. *
$5.25/12 at Blick Art
Hard Objects: Place fabric on a foam sheet. Brush a thin layer of paint on the object and press firmly to the fabric and lift straight up. *
Soft Natural Objects: Place fabric on a hard surface. Brush a thin layer of paint on the object and press lightly to the fabric. Go over it with a brayer. Gently peel off the object. *
No comments:
Post a Comment