
Light table
3/4" Flat wash brush
Water
Acrylic paint
Colored pencils
Ruler and pencil
Fine point sharpie
Matte poster board
Craft Bond spray adhesive
White Cotton fabric, pre-washed
Rubbing alcohol
Goo Gone
My light table is a 30x36" sheet of acrylic on top of a quilting frame with a brooder lamp clamped to a leg. You can do the same thing with an old aluminum frame window rested on the back of two chairs.
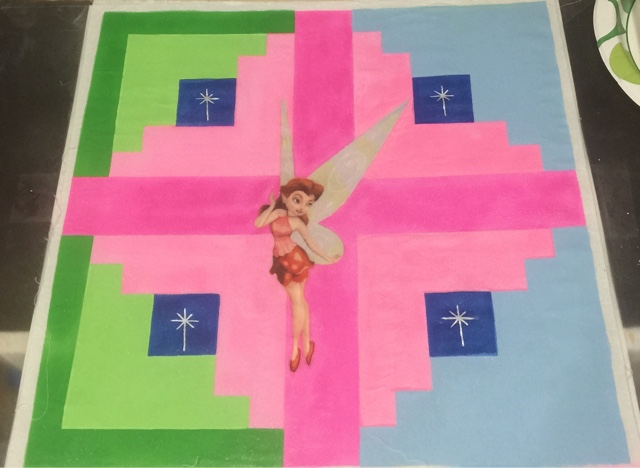
First, decide on the block pattern and layout for your quilt. I chose a log cabin block arranged in a cross layout. Next, decide on the size of your blocks or whether to paint whole cloth. I cut my blocks into 17-1/2" squares. I thought this would be the perfect size to make the project manageable and reduce the number of seams. The problem I ran into was when I sewed the painted blocks together, they didn't all match up. They were skewed both horizontally and vertically which required some adjusting. My cutting wasn't exact on all of the blocks and neither was their placement over the template. I learned that precision is more critical with this method than with traditional patchwork. Cut the blocks 1" larger than you need them and cut them down to size after painting.

Measure and draw your finished block on a sheet of poster board. Mark over your pencil lines with a sharpie. If you're painting whole cloth, you don't need a seam allowance. If you're painting blocks, mark a 1/4" seam allowance on all four sides. Mark or color in the block, making sure your lines are visible. Spray the underside of the acrylic sheet or window with adhesive. Stick the poster board template to it and smooth it down with your hands. Heat from the light will heat the glue and cause the template to come loose so you'll have to re-glue it periodically.

Spray the top of the acrylic with adhesive. Roll up the block or whole cloth and align the top edge to the top of the template. Press the fabric to the sheet as you unroll it. Smooth out wrinkles as you go. It can be re positioned if necessary.

Mark lines on your fabric and color code the areas with colored pencil. If your fabric has an inkjet transfer like mine, trace around it with colored pencil.

The thinner the fabric, the more the paint will bleed. Keep that in mind when choosing fabric or mixing water with your paint. To keep your paint inside the lines, it should be the consistency of heavy whipping cream. I tried painter's tape to keep my lines straight and control bleeding. It didn't work. Liquid masking fluid didn't work either. You have to pay attention to what you're doing.

After you've finished a block, clean the acrylic sheet. Rubbing alcohol will remove paint. Goo Gone removes the adhesive. Remove excess Goo Gone with a paper towel. Go over the sheet again with rubbing alcohol and you're ready for the next block.

how do you preserve paint on a quilt painted in the 1980's so I can use it and maybe wash it if it gets dirty? is this possible?
ReplyDeletethank you
Brush over the paint with Liquitex Fabric Medium or Matte Varnish. My Photo Transfer page covers this method in detail.
Delete