
(2) 3/4x18x18" Sande Plywood
(4) 18" lengths 1" I. D. Charlotte pipe
(4) 30" lengths 1" I. D. Charlotte pipe
(2) 8" lengths 1" I. D. Charlotte pipe
(4) 1" 3-way outlets
(4) 1" End caps
(4) Locking Casters
(4) 1/4 x 2" Carriage bolts
(4) 1/4 x 1-1/2" Phillips head flush bolt
(8) 1/2" long Phillips head screws
(8) Mirror mounting clips
(12) 1/4" Machine nuts
Ratchet and 1/4" deep socket
Jig saw
Drill
1/4" drill bit
3/8" drill bit
1/2" drill bit
1/2" drill bit
Sheet of poster board
Pencil
Sharpie, fine point
Ruler
Scissors
Craft Bond spray adhesive


Turn the board over and mark holes close to the 4 main corners where the machine will rest. Place this piece on top of the second piece of plywood. Drill the marks through both boards. Screw mirror mounting clips close to the holes onto the board using 1/2" long screws. Turn the cutout board right side up. Place Phillips head flush bolts into the holes. Cut 2-3" off of each side of the second board.
Drill a 1/4" hole in all four corners of the board. Drill a 1/4" hole through the top of four 3-way outlets. Drill a 3/8" hole through four end caps.

Slide the 18" lengths of pipe into two 3-way outlets. Slide the 8" lengths of pipe into those 3-way outlets. Attach the other 3-way outlets to the 8" pipes. This makes the table frame. Slide the bolt through a hole in the board. Repeat for the other holes. Slide a 3-way outlet onto the bolt and attach the nut. Tighten with a ratchet. Repeat for the other three outlets.
Slide the second piece of plywood onto the Philips bolts under the table and secure with nuts. Tighten with a wrench. The machine will rest on this board. Place the machine on this board and continue to tighten the nuts until the machine is flush with the table.
Slide the second piece of plywood onto the Philips bolts under the table and secure with nuts. Tighten with a wrench. The machine will rest on this board. Place the machine on this board and continue to tighten the nuts until the machine is flush with the table.
Slide a caster into the hole of an end cap and tighten the nut with the ratchet. Repeat with the other three casters. Slip the end caps onto the 30" long pipes. Slip the legs into the 3-way outlets.
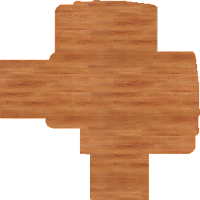
The board is cut out so the machine can be used in either orientation, for sewing or quilting. Most of the time, the machine will rest flush with the table. When you need to use the free arm for hemming, set the above piece into the space and lock it with the mirror clips. Set the machine on top.
Do you have a picture of the actual mobile Sewing table? I am very interested in building me one.
ReplyDeleteNo, I don't. I haven't even had time to build it. I posted the plan for it and got busy doing other things.
Delete