Showing posts with label Rolling. Show all posts

Monday, July 18, 2016

DIY Mobile Sewing Table

This sewing table makes your machine mobile and replaces the track system associated with long arm machines. The frame and casters go together the same way as the rolling quilt frame. The only difference is there are fewer pipes and it has a table. Measure the base height, width of the front arm and back of your machine. Mine is 3" high, 8" wide at the back, and 4-1/4" wide at the front.

(2) 3/4x18x18" Sande Plywood
(4) 18" lengths 1" I. D. Charlotte pipe
(4) 30" lengths 1" I. D. Charlotte pipe
(2) 8" lengths 1" I. D. Charlotte pipe
(4) 1" 3-way outlets
(4) 1" End caps
(4) Locking Casters
(4) 1/4 x 2" Carriage bolts
(4) 1/4 x 1-1/2" Phillips head flush bolt
(8) 1/2" long Phillips head screws
(8) Mirror mounting clips
(12) 1/4" Machine nuts
Ratchet and 1/4" deep socket
Jig saw
Drill
1/4" drill bit
3/8" drill bit
1/2" drill bit
Sheet of poster board
Pencil
Sharpie, fine point
Ruler
Scissors
Craft Bond spray adhesive
Set your machine on a sheet of poster board. Trace around it with a pencil. Clean up your lines with a ruler and a sharpie. Cut out the shape. Spray the shape with adhesive and stick it onto the board in the center. Trace a line around the shape.
Remove the shape and position it across the shape on the board. Trace around the shape again. Remove the paper. Drill a 1/2" hole close to the line inside the shape. Cut the shape out of the wood with a jig saw. Save this piece. 
Turn the board over and mark holes close to the 4 main corners where the machine will rest. Place this piece on top of the second piece of plywood. Drill the marks through both boards. Screw mirror mounting clips close to the holes onto the board using 1/2" long screws. Turn the cutout board right side up. Place Phillips head flush bolts into the holes. Cut 2-3" off of each side of the second board.

Drill a 1/4" hole in all four corners of the board. Drill a 1/4" hole through the top of four 3-way outlets. Drill a 3/8" hole through four end caps.
Slide the 18" lengths of pipe into two 3-way outlets. Slide the 8" lengths of pipe into those 3-way outlets. Attach the other 3-way outlets to the 8" pipes. This makes the table frame. Slide the bolt through a hole in the board. Repeat for the other holes. Slide a 3-way outlet onto the bolt and attach the nut. Tighten with a ratchet. Repeat for the other three outlets.

Slide the second piece of plywood onto the Philips bolts under the table and secure with nuts. Tighten with a wrench. The machine will rest on this board. Place the machine on this board and continue to tighten the nuts until the machine is flush with the table.

Slide a caster into the hole of an end cap and tighten the nut with the ratchet. Repeat with the other three casters. Slip the end caps onto the 30" long pipes. Slip the legs into the 3-way outlets.
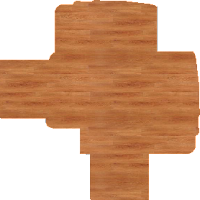
The board is cut out so the machine can be used in either orientation, for sewing or quilting. Most of the time, the machine will rest flush with the table. When you need to use the free arm for hemming, set the above piece into the space and lock it with the mirror clips. Set the machine on top.

Saturday, July 2, 2016

DIY Rolling Quilt Frame

This frame is an improvement on the DIY Flynn Multi Frame. I decided to use two extra pipes below the frame to keep the batting and backing off the floor. However, this caused a drag problem. I removed these extra pipes from the instructions even though my bottom photos show the original frame. All three layers can be rolled together on the top rail. You could also roll the backing only and float the top and batting. The clamps will keep them tight enough without rolling.

Furniture grade pvc is better than Charlotte pipe for this project, but I wanted to see if it was feasible before upgrading. This frame is not adaptable with Charlotte pipe because it isn't rigid enough. Pieces will come apart if you try to connect them with couplers. It can be made to 60" or 5 feet long with furniture grade pvc. Home Depot does not sale 10 foot pipes. Two pipes would have to be joined with couplers to accommodate anything larger than a throw size quilt. The minimum depth is 18" to prevent the quilt from dragging on the machine. The legs can be adapted to the height of your sewing machine. You can sit or stand while using it. 

I recommend a machine with a minimum throat space of 7". The back pipe will take up 1" of space without a quilt rolled on to it. You need an additional 1" of space for 360 degree movement around the needle. Whatever your throat space is, subtract 2" to get your working space. A 7" throat space will give you 5" of working space. That's usually enough for continuous line quilting, end to end. If all you have is a small domestic machine with a 5" throat space, you'll be limited to 2" wide continuous line quilting or channel/ditch quilting. A machine with 9" or more of throat space is necessary for block or negative space quilting.

(4) 60" 1-1/4" I.D. Furniture grade pvc (frame and support rails)
(2) 60" 1-1/4" I.D. Furniture grade pvc (legs)
(4) 29"-- Cut 2 lengths from two 60" pipes (legs)
(1) 60" 1-1/4" I.D. Furniture grade pvc (scrap pipe)
(4) 18" cuts from scrap pipe (frame and support rails)
(4) 2" cuts from scrap pipe (bottom tee spacers)
(4) 1-1/4" 3-way 90 degree elbows (frame top)
(4) 1-1/4" 4-way tees (bottom support rails)
(4) 1-1/4" Internal Dome Caps (for rails)
(24) 1-1/2" #8 Hex Washer Head screws (for stability)
(4) 3/8" dia. 3" Lag bolts (for rails)
(4) 3/8" dia. Wing nuts (for rails)
(8) 3/8" dia. Washers (for rails)
(4) 1-1/4" Caster Pipe Caps (for casters)
(4) 3/8" dia. Hex nuts (for casters)
(4) 3/8" dia. Washers (for casters)
(1) 1-1/4" x 4' Pipe Clamp
PVC glue
Drill
3/8" drill bit for bolts
3/16" drill bit for screws
Ratchet and 3/8" deep socket
Phillips screwdriver
Dremel with reinforced cut off wheel or hacksaw
Tape measure
Sharpie
Painter's tape

Using a dremel, cut (4) 29" lengths from two of the 60" pipes. Cut 18" pieces and 2" pieces from scrap pipe. The easiest way to keep your cuts straight is to wrap painter's tape around the pipe where the mark is. Double check pieces cut by a lumber yard. Most of mine were up to a 1/2" too long and one was a 1/4" too short.
Hold the dome caps steady on a hard surface and drill a 3/8" hole for the rails. It's best to use a drill press for this, if you have one. Drill 3/8" holes through the center of the elbows and tees as well. You only have to do this for the frame rails.

Slip a washer onto each bolt and slip the bolt through each cap. Swirl a bit of glue inside 2 of the 60" pipes and slide in the plugs. Let the glue cure. Slip another washer onto each bolt. Screw on a wing nut. You'll have to remove the wing nuts when you insert the pipes into the elbows and tees. This prevents the pipes from slipping out while allowing the frame to be dismantled easily for storage. The frame rails will still roll the quilt while bolted in.

Assembly

Slide two elbows onto a 60" pipe, making sure the bolt comes out the other end. Slide a washer onto the bolt and screw on a wing nut.

Slide the two 18" lengths of pipe into the 3-way elbows. These can't be bolted. The bolts can only go one way. However, they can be screwed into place with short screws for stability. Drill (2) 3/16" holes through the sides of the elbows and through the pipe. Secure with hex screws. Bolts and nuts can be used for this, but you have to use a drill press to get the holes perfectly straight.

Slip another 60" pipe into the other 3-way elbow, making sure the bolt comes out the other end. Slide a washer onto the bolt and screw on a wing nut. Slide the 3-way elbow onto the 18" pipe. Drill (2) 3/16" holes through the sides of the elbows and through the pipe. Secure with hex screws. This makes the top of the frame. 
Slide a caster into the hole of a caster pipe cap. Slide a washer onto the bolt. Screw on a hex nut and tighten with the ratchet. Repeat with the other three casters.

Slide 2" pipes into the caster pipe caps. Slide 4-way tees onto the 2" pipes. Slide 29" pipe into the tees. Repeat for the other 3 legs.

Slide a 60" pipe into the 4-way tees. Drill (2) 3/16" holes through the sides of the tees and through the pipe. Secure with hex screws. Do the same for the back. These are the bottom support rails.

Slide 18" pipes into the 4-way tees connecting the front and back legs. These can't be bolted. The bolts can only go one way. However, they can be screwed into place with short screws for stability. Drill (2) 3/16" holes through the sides of the tees and through the pipe. Secure with hex screws.

Slide the legs into the 3-way elbows in the top of the frame. Drill (2) 3/16" holes through the sides of the elbows and through the pipe. Secure with hex screws.
The frame is finished. Attach clamps.
The backing is rolled onto the bottom pipe. The batting is rolled onto the middle pipe. The top is rolled onto the first pipe. The finished quilting is rolled onto the back pipe. The pipes don't move. The layers wrap easily around the pipes with the clamps. This is a major improvement on the original frame.

Assessment
It works better than the Flynn frame and it functions best on a smooth floor. It's still best suited for narrow continuous line quilting. The narrow throat space on my machine is the problem.