
Learning how to create texture will take your coloring to a whole new level. Texture is achieved with layers of long or short strokes in various colors to create the illusion of stone, grass, feathers, wood, hair and fur. Squiggly random lines create tree bark. Wavy lines combined with ellipses create wood grain. Dead texture is found on inanimate objects like dead and finished wood or marble. I like to burnish these with a white or pale color pencil for a soft focus effect. The Prismacolor Verithin pencils, Crayola or 2mm mechanical colored pencils work better for this technique than oil or wax based pencils.
Marble

This marble is fairly straightforward. It's only a series of squiggly and broken random lines. Burnish them with a white pencil for a soft focus effect.
Grass


Grass is created with a series of long thin strokes arching in opposite directions with some straight lines. Grass is never one solid color. It is a dark, midtone, and light shade of one color, alternating with an analogous highlight color. The highlight for green is usually a yellow of the same saturation. In the fall, it is brown, ochre, and yellow with a cream highlight. Grass can also be blue or red, as in Kentucky Blue Stem or Japanese Red.
Wood


Fill with 30% gray watercolor. Layer some areas with brown. Draw the details with 70% gray. Finish with a vertical center highlight gradient to give it roundness. Use 90% gray on one side and 50% gray on the other side for the shading and 10% gray for the highlight.

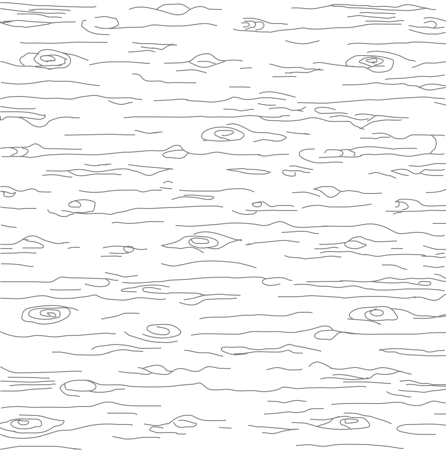
Fill with a light tan watercolor. Pencil in the wood grain with light brown and blend.


Fill with a light tan watercolor. Pencil in the wood grain with yellow ochre, burnt ochre, sienna brown, and burnt umber. Blend the wide lines and leave the others sharp.


Inner Bark: Fill with a horizontal center highlight gradient to give it roundness. Use 50% gray for the shading, sand for the midtone, and cream for the highlight. Draw the details with 30% gray and blend. Burnish with white for a soft focus effect.
Dead wood: Fill with 30% gray watercolor. Draw the details with 70% gray. Finish with a horizontal center highlight gradient to give it roundness. Use 90% gray for the shading and 10% gray for the highlight. Burnish with white for a soft focus effect.
Fur and Hair

Fur or hair is colored in thin strokes of one color layered over another. Some lines are blended to create an undercoat. The others should remain sharp. Each line should follow the direction of the fur. If there is a pattern, follow that as well. Begin with the lightest color and work to the darkest, allowing them to blend together. Alternate one color and then the other. Work in small areas at a time.


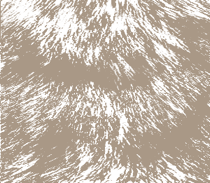
Layer 1: Putty Beige; Layer 2: Cool Gray 30%; Layer 3: Ginger Root; Layer 4: Warm Gray 50% + Espresso
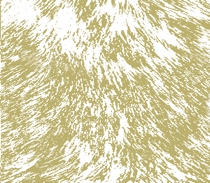


Layer 5: Yellow Ochre; Layer 6: Burnt Ochre; Layer 7: Dark Brown; Layer 8: Burnt Umber + Black
Feathers and Wings

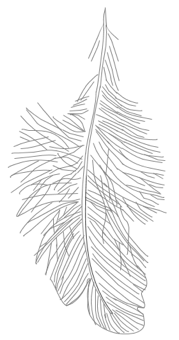
Feathers are colored in strokes of colors beside and into one another. When drawn, the lines should run together to look realistic. Begin with a watercolor glaze. The watercolor should match the lightest color of the feather. This area will not be colored, but will have lines going into it. Some lines are blended to create fluff. The others should remain sharp. Each line should follow the shape of the feather. If there is a pattern, follow that as well. Begin with the lightest line color and work to the darkest, allowing them to blend together.

Wings follow the same principle as individual feathers, except they are not blended as much. Begin with a watercolor glaze and pencil in the detail following the direction of the feathers.
Etching

I use an etching needle for removing color to create whiskers or light rays. Some artists use a craft knife to create highlights and hair. Only the edge or point of the craft knife is used to scrape off color. Other artists prefer a box blade.

Scotch Magic tape combined with a sculpting thumb or etching needle will also lift color to create subtle highlights.
Dotting and Highlighting

I use nail dotters for applying chalk paint to create tiny white highlights or stars. Larger dots for flower centers and eyes can be created with clay shaping tools.

Sakura Gelly Roll pens in fine, medium and bold are also a good choice for highlights.
Polishing

Polishing is achieved by forcful pressure and friction with a hard, blunt object. The best thing to use is a stainless steel spoon. If you don’t know if a spoon is stainless, just buy one specifically for this purpose. The goal is to polish a heavy coat of wax and make it shiny. You can use the Caran d' Ache blender to add extra wax. Any tool you use should be smooth. This should be the last method you use. Some metals will leave a deposit on the wax. This was the case with nail dotters and clay shapers. They leave silver streaks from the metal on light colors. The roundness also makes an indentation in the paper.

A clay sculpting thumb is the best thing I've found for polishing colored pencil in a large area and for polishing light colors. Clean with acetone.
No comments:
Post a Comment