
The illusion of soft light is accomplished by combining shading with a gradient. The light appears to shine from within the object and is usually a pale value of the midtone or an analogous color. The light shines from a distance and a soft pale shadow is close to the object.
Soft Light


1) Outline the circle with the darkest color.
2) Use a dark color inside the outline beginning at the top and work to the bottom. Color one side and then, the other.
3) Using light strokes, work inward from the bottom with the dark color. Color only about 1/8 of the bottom and less of the sides working to the top with very little color.
4) Fill in the small circle with a pale color for the highlight.
5) Apply the midtone lightly inside the dark color, working toward the highlight.
6) Add two more layers to the dark color.
7) Add two more layers to the midtone closest to the dark, getting progressively lighter as you move toward the highlight.
8) Blend the colors together with a blender pencil beginning with the dark color, moving toward the highlight.
9) Blend the highlight into the color until only a hint of light remains.
10) Burnish with white for a soft focus effect or blend with solvent.
Lighting conditions affect the color of shadows. When light is warm, the shadow is cool. When light is cool, the shadow is warm.


Sunlight casts a white light and a cool gray shadow. A candle casts a yellow light and French gray shadow. Sunrise and sunset may cast a pink, purple or red-orange light and a cool gray shadow.


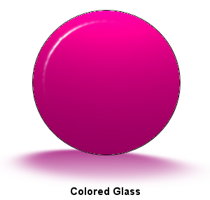
Moonlight, fluorescent and low light cast a blue light and a warm gray shadow. A colored bulb casts the same color of light as the bulb and the shadow is a blend of the bulb color and the color of the object. Colored glass reflects a white light and casts the same color of shadow as the glass.
Hard Light


1) Outline the circle with the midtone.
2) Lightly shade the dark area with a 9H graphite pencil beginning at the top and work to the bottom. Color one side and then, the other. Color only about 1/8 of the bottom and less of the sides working to the top with very little shading. Fill in the shadow with a light layer as well.
3) Using light strokes, work inward from the bottom with the graphite.
4) Apply a second layer of graphite deepening the shading close to the outline and at the bottom of the circle where the interior shadow line is. Also deepen the shading in the shadow close to the circle. Smudge it outward and soften the shadow edges.
5) Lightly spray the graphite with a workable fixative.
6) Apply a light layer of a dark colored pencil over all of the graphite.
7) Fill in the rectangle with white.
8) Apply the midtone lightly inside the dark color, working toward the highlight.
9) Add two more layers to the dark color, except for the shadow where it only needs to be deepened close to the circle.
10) Add two more layers to the midtone closest to the dark, getting progressively lighter as you move toward the highlight.
11) Blend the colors together with a blender pencil beginning with the dark color, moving toward the highlight.
12) Blend the edges of the highlight into the color, leaving it mostly white.
13) Apply solvent and blend with a brush. (optional)
Eyes
Eyes are a combination of a gradient and hard light that incorporate the glazing technique.


1) Start with a round center light gradient, but only use two colors and leave the light out of it.
2) Draw a circle with a dark color and thicken the line.
3) Fill the circle with watercolor in a light shade of the same color.
4) Let the paper dry.
5) Color over the glaze.
6) Blend the dark color into the light color with a blender pencil.
7) Draw another dark circle inside the light circle about 1/3 of the way from the edge. Thicken the line. Blend this line toward the outer edge using hard single strokes, leaving a ring of light color visible. Continue blending until the lines are blurred, but you can still see some strokes.
8) Draw the pupil inside the dark line, leaving some of the line showing. Allow a spot of light color peek through for the highlight. Blend this light color into the pupil just enough to soften the edge.
9) Add white to the highlight and blend with the light color. Using a dotting tool and white acrylic, add a touch of white to the center of the highlight.
10) Outline the eye again with the dark color. Lightly soften the edge with the blender pencil.
11) Polish the entire eye with a dotting tool to make it shiny.
No comments:
Post a Comment