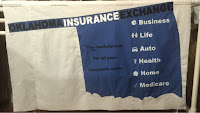
I was given a small digital graphic to base it on. Luckily, the graphic was the state of Oklahoma.
I pulled out a state map and used it as the basis for the appliqué shape. I used dressmaker chalk paper and a tracing wheel to transfer the shape onto poster board.
This is the finished appliqué.
I measured the width of the panhandle and cut strips of paper the same width, and then glued the strips together. I used Paint Shop Pro to render the text for the top. Rather than print out the text, I taped the paper strip to my computer monitor and traced it. I turned the paper over and traced around the letters with an iron on transfer pen and ironed them to the fabric. I used MS Word to render the remaining text and symbols which I printed and taped to my light table.
My next task was to paint the lettering. I used Elmer's Paint Pens in fine and medium point for the first two layers, and then went over them with two more coats of acrylic with fabric medium and a #2 flat brush.


No comments:
Post a Comment