
I recently made an on-point quilt with appliqué and plain blocks. I neglected to cut my appliqué blocks a 1/2" larger and they all ended up different sizes and a bit smaller than the expected finished size. The stencil that came with the pattern didn't fit. I had to adjust the stencil to fit each block.

Launch your image editing program. Open the stencil image. Edit>Copy.

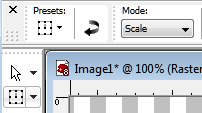
New Image: 8.5 x 8.5" and 300 dpi. Selections>Select All. Edit>Paste>Paste Into Selection. Deselect.

Use the Pen tool set to Drawing Mode, Line Segment, Width: 2 pixels, Background: null.

Line up your cursor to an inch mark. Click and hold down the Shift key to draw a straight line. Right click on the vector layer and Convert to Raster Layer. Draw another line at the next inch mark and convert to raster layer. Layers>Merge>Merge Down.
Use the Deform tool to move the lines so the line on the left is lined up with the inside of the stencil.

Use the Freehand Selection tool set to Point to Point.

Select one side of the stencil corner to corner.

Make sure that your selection goes through the point where the lines intersect.
Selections>Promote Selection to Layer. Click on the layer beneath it and hit the delete key. Deselect. Now, separate one of the corners from the rest of the stencil, promoting it to its own layer and deleting it from the layer beneath it. Select and delete the other three corners on the bottom layer.

Click on the corner layer. Use the Deform tool again set to Scale and make the stencil fit in between the lines. Shorten to return the corner to its former shape. Layers>Duplicate. Image>Flip. Select the layer beneath it and use the Deform tool to make it fit between the lines. Shorten as before. Align one end to the corner. Duplicate this layer and line it up to the previous layer. Continue until you come to the bottom corner. You may need to use the Pen tool to make lines meet and use the Eraser tool to remove some lines. Make the corner layers and the bottom layer invisible. Merge Visible. Duplicate. Make this layer invisible. Merge the corner layers with the side layer. Image>Mirror.
View>Rulers. Zoom Image to 100%. Use the Deform tool to move the stencil layer to 1/4" from the edge. Repeat for the other end. Merge these two layers.

Click on the invisible layer and make it visible. Image>Rotate>Free Rotate: Left, Rotate single layer around canvas center, Free 90 degrees. It will be at the bottom. Line this end layer up with the two corners. Duplicate. Image>Flip. Repeat for the top end. Merge Visible.

My stencil ended up larger than I wanted it. New Image: 8.5 x 8.5" and 300 dpi. Selections>Select All. Copy the stencil image. Click on the new image. Edit>Paste>Paste Into Selection. Deselect. I duplicated this layer twice and merged the layers visible to darken the lines and make them sharper. Using the deform tool makes images blurry.
If the stencil will not fit inside page margins, select one end, copy and paste as a new image. Print the stencil on two sheets of acetate.

Glue them together using Loctite All Purpose GO2 Glue. It is specially formulated for gluing plastic.


Original Modified
No comments:
Post a Comment