
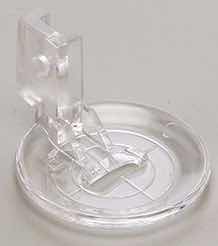
There are two problems with this foot.


1) It only has a single hole. The 1/4" ruler foot pictured above has an oblong hole and an open arm groove making it adjustable.


2) The arm groove in the Brother/Distinctive foot is closed. The Husqvarna/Pfaff foot on the right has an open groove.
Rather than throw mine away, I modified it to make it adjustable.

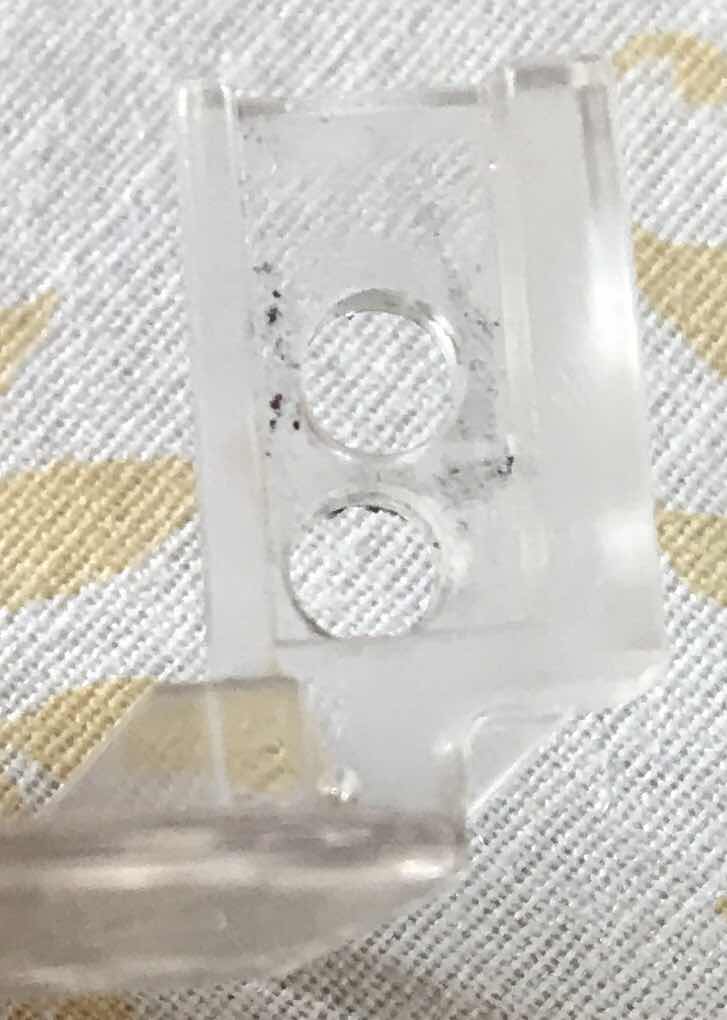 Mark a hole beneath the one on the foot. It doesn't have to be perfect. Start the hole by hand to get a good indentation so the bit doesn't slip when you use the drill. Set the foot arm on a hard wooden surface. Don't let the drill scare you. Only tap the trigger one time and let the bit stop spinning before you tap it again. Continue tapping until the bit is almost through the other side. Turn the foot on the bit by hand until the bit comes all the way through. Continue turning until you have a clean hole and remove the foot from the bit. You're done with the drill.

 Use the chisel again to remove the plastic pieces indicated by the arrows. A 1/4" chisel fits perfectly inside the arm groove. Tap gently until the pieces come loose and are easy to remove.
 Use a dremmel to remove excess plastic that didn't chip off.
 Continue using the dremmel to smooth the plastic and make adjustments so the foot is level with the presser arm and sits flush on the foot bed. This will take a little time. Don't rush it. Attach the foot to the presser arm and check it as you go.

Tools
9/64" drill bit and drill
1/4" wood chisel and hammer
#84922 silicone carbide grinding tip and dremmel
You could also use a 4mm ceramic stone (pink). Whichever one you use needs to be conical shaped. The aluminum oxide stone is too coarse.
Mark a hole beneath the one on the foot. It doesn't have to be perfect. Start the hole by hand to get a good indentation so the bit doesn't slip when you use the drill. Set the foot arm on a hard wooden surface. Don't let the drill scare you. Only tap the trigger one time and let the bit stop spinning before you tap it again. Continue tapping until the bit is almost through the other side. Turn the foot on the bit by hand until the bit comes all the way through. Continue turning until you have a clean hole and remove the foot from the bit. You're done with the drill.Use the chisel and hammer to remove the plastic between the two holes so you end up with a single oblong hole. Also chip off the pieces sticking out into the hole.
 Use the dremmel to smooth the hole. Mine isn't perfectly straight. It doesn't have to be.
Use the dremmel to smooth the hole. Mine isn't perfectly straight. It doesn't have to be.Use the chisel again to remove the plastic pieces indicated by the arrows. A 1/4" chisel fits perfectly inside the arm groove. Tap gently until the pieces come loose and are easy to remove.Use a dremmel to remove excess plastic that didn't chip off.Continue using the dremmel to smooth the plastic and make adjustments so the foot is level with the presser arm and sits flush on the foot bed. This will take a little time. Don't rush it. Attach the foot to the presser arm and check it as you go.You want the presser arm to rest on top of the foot.
When you're done, the foot height should be adjustable with the screw.

This is what it looks like with the presser arm lowered with the foot at the highest setting. I can now move the foot up or down on the arm so it glides over the quilt no matter how thick or thin it is.
No comments:
Post a Comment