The Feisty Quilter brings the fun back into quilting. It's a blog about experimentation where I post tutorials on every quilt I make. I also post a lot of research notes for future reference. You're welcome to experiment along with me and don't be afraid to ask questions.
Showing posts with label Fusible Appliqué. Show all posts
Showing posts with label Fusible Appliqué. Show all posts
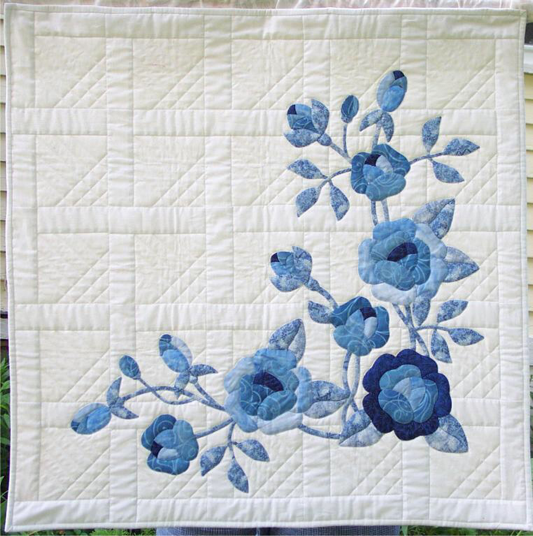
Traditional appliqué was always boring to me. The only fabric options were solids or calico prints and the shapes were so basic, they could have only appealed to a child. I couldn't wrap my mature, artistic head around it. Contemporary appliqué is different. Blender fabric and batiks have opened up a whole new world of possibilities. These vibrant, colorful fabrics make appliqué look realistic. Micro tip scissors make cutting sharp points and tiny curves easy. I no longer have to look at the basic shape of a Rose of Sharon with its perfectly round petals and flat red fabric.
I can now see a tea rose in full bloom with its natural curvy petals and graduated color. Appliqué has come to life!
Quilt Fusion is a free open source program for designing appliqué quilts. There is also a version for iPad.
Fabric Stabilizer (Perfect Sew): Add 1/2 teaspoon of clear Dawn dishwashing soap and 2 ounces of Elmer's clear washable glue to 16 ounces of cold water. Stir to combine. Spray on or soak fabric until wet. Allow to dry until damp and iron stiff. Stabilizes foundation fabric and appliqués.
Freezer paper is popular for making appliqué templates because it's reuasable at least three times.
Spray starch is brushed onto the edge that is folded over the freezer paper template and ironed into place.
Glue is generally used in machine appliqué and that glue can take many forms. Purple glue stick, Elmer's washable glue, fusible web and Fabri-Tac can all be used for tacking appliqués to foundation fabric. Appliqués can be straight stitched, blanket stitched, satin stitched or not stitched at all.
The glue stick is applied to appliqué edges for tacking to the foundation fabric. Both methods are commonly used for turned edge appliqué.
Washable glue is used with freezer paper templates. Brush a thick layer of washable glue onto the plastic side and iron it onto the wrong side of fabric. Cut the fabric to shape. Peel the paper off and the glue sticks to the fabric. Dampen the glue and iron the piece to another piece or to the foundation fabric. Fusible web is completely unnecessary and a waste of money if you intend to satin stitch the pieces.
Fusible web is ironed onto fabric and the shape is cut out. The paper is removed and the appliqué is ironed onto the foundation fabric. These pieces are usually not stitched.
Fabri-Tac is an alternative for adhering raw edge appliqués and tiny pieces that can't be sewn. It can be thinned with acetone and brushed on. It's permanent but flexible and can be washed. However, it is hard and scratchy once dry. It is best used for wall hangings.
Anything you can draw or copy can be used for fusible appliqué. Intricate designs are cut with a machine like the Brother Design N Cut or the Brother Scan N Cut SDX225 that reads PES embroidery files. Either machine can be connected to a computer. Fusible web is ironed into the wrong side of the fabric before it is cut.
A popular technique is to use an embroidery machine to make embroidered and reverse appliqué. This technique uses an embroidery design that is sent to the Brother Scan N Cut SDX225 or similar machine that cuts the fabric according to the PES file. That same file is used in the embroidery machine to robotically stitch the embroidery precisely around the appliqué.
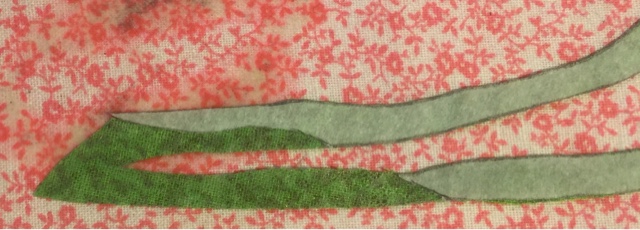
Bias tubes are used for flower stems and Celtic Knotwork.
Coats & Clark Trilobal Polyester or Dual Duty XP Fine are the best to use for satin stitch appliqué. Dual Duty XP can be used for blanket stitch or turned edge appliqué.
E 80/12: Embroidery w/Trilobal Polyester.
H-M 70/10: Microtex Sharp w/60 wt. Fine thread.
U 80/12 or 90/14: Universal w/35 wt. thread.
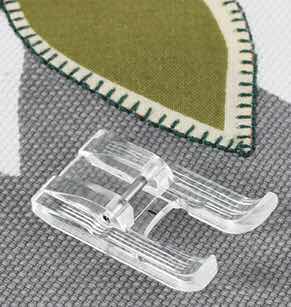
The Open Toe foot was originally designed with red markings for blanket stitching around raw edge wool felt appliqués. Brother later removed the markings from the metal foot, but retained the center mark on the clear foot.
A Curved Appliqué foot holds down turned edge appliqués and guides the needle for stitching around them.
An Open Toe foot (7 or 9mm) is used for satin stitch embroidery and attaching bias tubes. The 7mm is 1/4" wide and the 9mm is 3/8" wide.
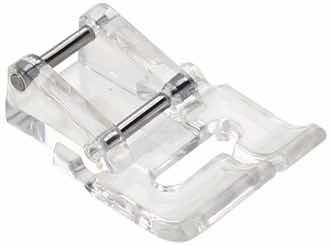
A Welting foot is used with cording cotton under the top for creating raised effects. It is available with a single or double groove. Single groove welting feet come in five different sizes: 1/8, 3/16, 1/4, 3/8, and 1/2". Double groove feet come in three different sizes: 1/8, 3/16, and 1/4".
Cording cotton is used for creating 3D Celtic Knotwork or raised effects with a welting foot.
A Piping foot is also used with cording to make piping that can be sewn between quilt borders or used to make pillows.
I wasn't planning to writie a tutorial for fusible appliqué because it's so easy. I'll be honest, I was really hesitant to try it. Will the edges fray? Will it stand up to washing? Since fusible art has taken the quilting world by storm, I decided to dive into it. The most important aspect of fusible appliqué is the fabric. Batiks, blenders and solids are the best ones to use. Prints are better suited for folk art. Batiks have effects than are nearly impossible to duplicate with a brush. They offer a visual appeal that really grabs you and pulls you in. Tonal blenders are used to achieve a gradation of color. Solids are good for small areas that are pushed into the background.
You don't need to purchase expensive fabric for fusible appliqué. I really advise against it when you're learning. Fusible appliqué should be the cheapest thing you can make in quilting. Wal Mart has a decent selection of fabric under the Creative Cuts and Waverly brands. A fat quarter only costs $0.97. A 21 count bundle of 5" squares is $4.95. A strip bundle is $6.77. A fat quarter bundle is $11.69. Solids are $2.97/yard. You really can't beat the price! If you're making a wall hanging or table set, you can make them for pennies. If you want to purchase designer fabric, connectingthreads.com has the best prices. Start with something small or whimsical to learn the technique, and then move onto something more advanced.
Pellon Wonder Under is $1.77/yard, but it's only 17" wide. You'll need at least three yards if you have a lot of pieces to cut. However, brushing a thick layer of washable glue on the plastic side of freezer paper is more cost effective. The glue sticks to the fabric and the paper shape is reusable with another coat of glue.
Fabric Stabilizer (Perfect Sew): Add 1/2 teaspoon of clear Dawn dishwashing soap and 2 ounces of Elmer's clear washable glue to 16 ounces of cold water. Stir to combine. Spray on or soak fabric until wet. Allow to dry until damp and iron stiff. Stabilizes foundation fabric and appliqués.
So let's get to it! You can do this in an image editing program and print the mirror image or you can do it by hand. Lay printer paper over a photo. Trace over the image with a fine tip sharpie. Be sure to get details where you see hard color shifts. Try not to get too detailed as you'll be cutting out these shapes. Flip the paper over and trace again. This is the mirror image. Lay freezer paper, paper side up on the traced mirror image. Trace the whole image first, and then trace the individual shapes that will be layered on top of it.
Mark the shapes according to the color of fabric you'll be using for them.
Cut out the shapes so you can place them on the fabric where you want them.
Dry iron the freezer paper onto the corresponding fabric. If you're using a print, iron on the wrong side. Always check your fabric for a wrong side!
Cut out the pieces. Micro tip scissors are best for this.
Remove the paper from the fabric. Use a craft knife to gently cut through the paper.
Bend the piece where it's cut and the paper will pop up.
Use the original traced image right side up as a placement guide.
Layer the pieces and dry iron again. Press and lift the iron. Gliding it will cause the pieces to shift.
This is where a color graduated bundle works in your favor. Determine where each layer covers the main image and mark the paper.
Cut the paper where you've marked it and only remove that portion of the paper.
Place the main image on the piece and iron from the back. Repeat this process for all the other layers. The tulips in this case will have to be pressed to the background fabric. You can stop here, if you wish. Fusible appliqué doesn't have to be painted.
The tulips have more petals than what I cut out. This was intentional. I didn't want all one shade of red, but I don't want solid pink either. You can go overboard with fusible the same as you can with paint. Combining the two gives you the best of both worlds.
I used printer paper to trace and cut out petals that will not be painted. I then outlined these areas on the tulips with a water erasable pencil.
Next, I made something like an angle ruler. I cut two 12" strips from a sheet of poster board. I also cut two 24" strips for large projects. Poke a thumb tack through one end of both strips. Bend the tack with pliers and clamp it down.
Use a large paper clip to hold an angle.
Natural light only shines straight down at high noon. Any other time of day or night, it shines at an angle. Use the angle ruler to find where light will hit an object. This is where the highlights will be painted.
The bottom edge of the ruler should be in line with the bottom edge of the image. My photo is a little crooked. Shadow always appears opposite light, outside of it, and beneath it. Every object casts a shadow, both on the background and on surrounding objects. The tulip buds in the image are below larger tulips so they should be a bit darker. Everything outside of the angle receives light, while everything inside of it doesn't.
I've marked the tulip where I'll paint highlights.
You may mark the original image showing where highlights, midtones, and shadows are located.
I've placed fusible fabric on my highlights.
Natural light is always white. Living objects absorb light and show a lighter variation of color. Inanimate objects, particularly metal and plastic reflect light and show the color of light that hits them. Water in the air refracts or scatters light and shows a prism of color. Light passes through water on the ground or in an object and shows what is beneath or behind it.
There is no such thing as a variation of white. These variations always contain color and are best used as soft shadows for indoor objects under artificial light. Incandescent light is yellow. Fluorescent light is blue. Soft white is gray. A heat lamp is red. A black light is deep blue or purple. Light can cast a shadow of any color that is in front of it, so you can really use your imagination on indoor objects.
Now that you understand light and shadow, it's time to pick your paint. Use fabric scraps to find shadow and deeper midtone colors. Use white for the highlights.
Palm Leaf will be used for two fabrics.
This is how white looks. The color shift is really subtle.
Painting your appliqués is optional, but it really gives them depth and dimension. You'll need craft acrylic or traditional watercolor and water in a 2 oz mister. You'll be using the watercolor technique. A drop of paint must be diluted with three spritzes of water to make it transparent.
You don't want a big glob of paint on your palette so you need to start with a tiny amount. Craft paint is so opaque that it takes a lot of water to dilute it.
If it still isn't transparent enough, remove half of the paint and dilute the remainder with the same amount of water. You can always add paint in layers to deepen the color, but you can never remove it.
This is a small project, so I'll be using a #2 flat brush. Dip the brush in water to soften the bristles and blot excess water. Dip only the tip of the brush into the paint. The color will travel up the brush. Water bleeds so you only need a tiny amount of paint for covering a small area.
Test on a scrap piece until you get a feel for how the water affects your painting. It absorbs and dries quickly. If you want to spread the paint and soften the edges, dip your brush into water before the paint dries and go over the area you just painted. You can see how watercolor creates a soft shadow. Now, you're ready to paint!
Paint the background first, then the shadow, and the line last. I used a 00 script brush for the line separating the dark pink background from the pink in the foreground.
Now, you can see how a little bit of paint makes everything stand out.
I discovered that backing freezer paper with card stock sprayed with tack adhesive works best for an image that requires a lot of cutting.
I removed the freezer paper and card stock in one piece.
I painted over some of the grass with Kiwi and filled in shadows with Marsh Green. Grass is never one solid color.
I marked and cut a line where I will insert the tulip.
I removed the freezer paper from the tulip.
I inserted the tulip into the cut.
I ironed the entire piece onto the background fabric.
I painted more grass to fill it in.
I made another grass appliqué to fill in space between the tulips. I placed four tulip bunches on this quilt.
Each appliqué turned out a little different so I cut the extra grass where it met the grass on the tulips.
I painted more grass in Hunter Green and the other two colors to complete the image.
I decided to paint the main body of the butterflies instead of using a lot of fabric.
I used Diva Pink with retarder medium for the butterfly and fused batik fabric inside the wings.
I lined where the wings meet and painted the body black.
I traced and painted the antennas directly onto the background fabric.
The last thing I did was steam set all the appliqués front and back. Adhesive only serves to baste the appliqués which is fine for a wall hanging, but a quilt has to be stitched.
My next task was securing all these appliqués with a satin stitch. The setting on my Brother machine is #4, width = .5; length = 2.5. I used a 76/11 Schmetz embroidery needle and Coats & Clark Dual Duty XP thread. I sprayed stabilizer onto the foundation fabric, allowed it to dry until damp and ironed it to stiffen. A satin stitch for appliqué needs to be a little loose. It isn't like embroidery or monogram. It's okay if fabric shows through the stitches. Let the machine run at its pace. I normally sew at half speed anyway. It's better to sew slowly and have your stitches look neat and uniform than to let the machine get away from you and end up with sloppy stitches. Good quality takes time.
Front Back
Finished tulips
Front Back
Finished butterfly
Finished tulips and grass
I used different colored thread for the leaves, stems, and grass. You can see how each color accents the highlights and midtones. The threads also bring each blade of grass to a point, making it look more realistic. Lastly, I snipped all the stray appliqué threads close to the sewing threads.