Showing posts with label Turned Edge Appliqué. Show all posts

Friday, August 25, 2017

Fusible Appliqué

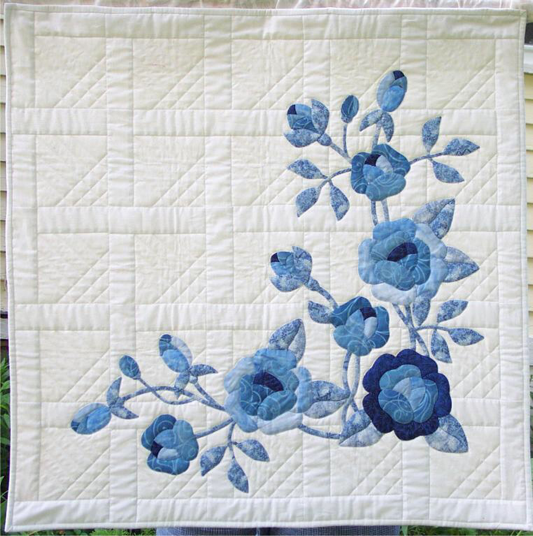
Traditional appliqué was always boring to me. The only fabric options were solids or calico prints and the shapes were so basic, they could have only appealed to a child. I couldn't wrap my mature, artistic head around it. Contemporary appliqué is different. Blender fabric and batiks have opened up a whole new world of possibilities. These vibrant, colorful fabrics make appliqué look realistic. Micro tip scissors make cutting sharp points and tiny curves easy. I no longer have to look at the basic shape of a Rose of Sharon with its perfectly round petals and flat red fabric. 

I can now see a tea rose in full bloom with its natural curvy petals and graduated color. Appliqué has come to life!

Quilt Fusion is a free open source program for designing appliqué quilts. There is also a version for iPad.
  
Fabric Stabilizer (Perfect Sew): Add 1/2 teaspoon of clear Dawn dishwashing soap and 2 ounces of Elmer's clear washable glue to 16 ounces of cold water. Stir to combine. Spray on or soak fabric until wet. Allow to dry until damp and iron stiff. Stabilizes foundation fabric and appliqués. 

Freezer paper is popular for making appliqué templates because it's reuasable at least three times.
Spray starch is brushed onto the edge that is folded over the freezer paper template and ironed into place.

Glue is generally used in machine appliqué and that glue can take many forms. Purple glue stick, Elmer's washable glue, fusible web and Fabri-Tac can all be used for tacking appliqués to foundation fabric. Appliqués can be straight stitched, blanket stitched, satin stitched or not stitched at all.
The glue stick is applied to appliqué edges for tacking to the foundation fabric. Both methods are commonly used for turned edge appliqué.
Washable glue is used with freezer paper templates. Brush a thick layer of washable glue onto the plastic side and iron it onto the wrong side of fabric. Cut the fabric to shape. Peel the paper off and the glue sticks to the fabric. Dampen the glue and iron the piece to another piece or to the foundation fabric. Fusible web is completely unnecessary and a waste of money if you intend to satin stitch the pieces.
 
Fusible web is ironed onto fabric and the shape is cut out. The paper is removed and the appliqué is ironed onto the foundation fabric. These pieces are usually not stitched.
Fabri-Tac is an alternative for adhering raw edge appliqués and tiny pieces that can't be sewn. It can be thinned with acetone and brushed on. It's permanent but flexible and can be washed. However, it is hard and scratchy once dry. It is best used for wall hangings.

Anything you can draw or copy can be used for fusible appliqué. Intricate designs are cut with a machine like the Brother Design N Cut or the Brother Scan N Cut SDX225 that reads PES embroidery files. Either machine can be connected to a computer. Fusible web is ironed into the wrong side of the fabric before it is cut.
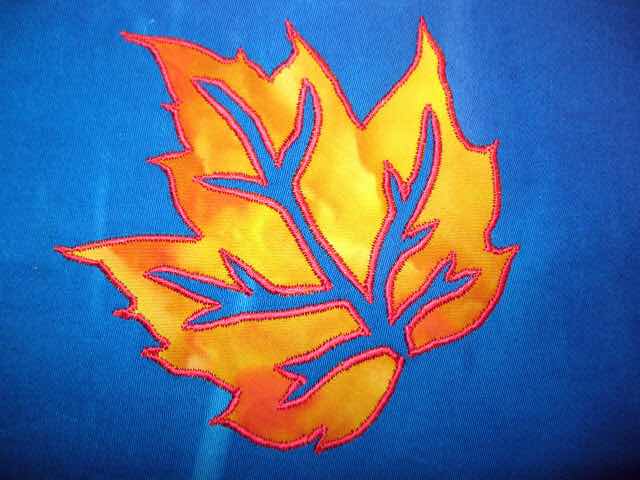
A popular technique is to use an embroidery machine to make embroidered and reverse appliqué. This technique uses an embroidery design that is sent to the Brother Scan N Cut SDX225 or similar machine that cuts the fabric according to the PES file. That same file is used in the embroidery machine to robotically stitch the embroidery precisely around the appliqué. 
  
Bias tubes are used for flower stems and Celtic Knotwork.
    
Coats & Clark Trilobal Polyester or Dual Duty XP Fine are the best to use for satin stitch appliqué. Dual Duty XP can be used for blanket stitch or turned edge appliqué.
E 80/12: Embroidery w/Trilobal Polyester.
H-M 70/10: Microtex Sharp w/60 wt. Fine thread.

U 80/12 or 90/14: Universal w/35 wt. thread.
 
 
The Open Toe foot was originally designed with red markings for blanket stitching around raw edge wool felt appliqués. Brother later removed the markings from the metal foot, but retained the center mark on the clear foot.
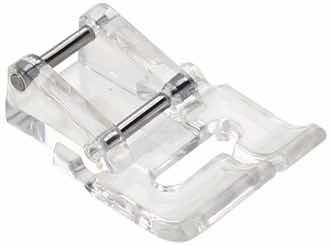
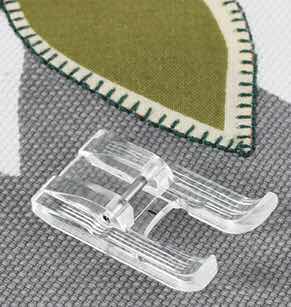
A Curved Appliqué foot holds down turned edge appliqués and guides the needle for stitching around them.
 
An Open Toe foot (7 or 9mm) is used for satin stitch embroidery and attaching bias tubes. The 7mm is 1/4" wide and the 9mm is 3/8" wide.


A Welting foot is used with cording cotton under the top for creating raised effects. It is available with a single or double groove. Single groove welting feet come in five different sizes: 1/8, 3/16, 1/4, 3/8, and 1/2". Double groove feet come in three different sizes: 1/8, 3/16, and 1/4".
 
Cording cotton is used for creating 3D Celtic Knotwork or raised effects with a welting foot.
 
A Piping foot is also used with cording to make piping that can be sewn between quilt borders or used to make pillows.

Monday, May 11, 2015

Turned Edge Appliqué

Hand appliqué is such a daunting task for most of us, especially if we've never done it before. When I first attempted appliqué, the trouble I had was getting the 1/4 inch seam allowance for the turned edge. Then, there's the problem of holding the shape in place while you sew. There are a lot of fusible products available, but the majority of them create stiffness.

I'm going to show you how I make my own templates using Paint Shop Pro. Any image editing program will work, so long as you can make a selection, expand it, select the outside borders, and fill. It's easy and you can use any simple line drawing. Part of the process is the same for separating portions of a complex image for layered appliqué.
Click on the New Image Tool.
If you want to make a 5 inch shape, choose Inches under Units and set the dimensions to 5. Set the resolution to 72.
Click on the Shape Tool.
Select your shape. I'm using a heart. There may not be a heart shape in your program. I made mine. 5 pixel width is the same thickness as a medium point sharpie.
In the Color Palette, make the foreground Black and the background invisible.
Place your cursor in the upper left corner of the canvas. There is a guide at the bottom right of the program that shows your image dimensions. In this case, it's 360.
The X and Y coordinates inside the parentheses will change as you move your cursor. Begin at coordinates (x:20 y:20) and end on 340 (360-20).
Go to Layers and choose Convert to Raster Layer.
Make any necessary corrections to the shape. I had to fill mine in a bit.
Choose the Magic Wand Tool.
Click outside the shape.
Now go to the Selections menu and click Invert.
Go to the Selections menu again and click Modify and choose Expand.
Set it for 10 pixels.
Expanded selection
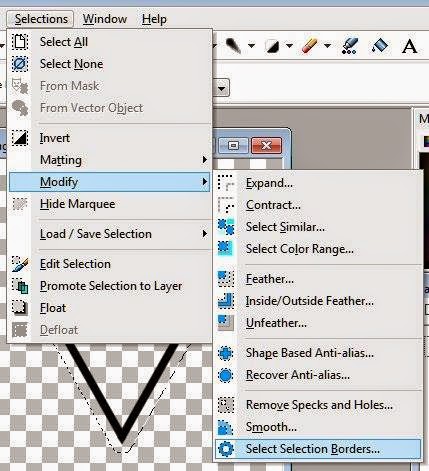
Go back to Selections and click Modify then choose Select Selection Borders.
Set it for Outside Borders at 3 pixels, Anti-alias checked.
Create a new layer (Layers>New Raster Layer) and select it.
Fill with any color.
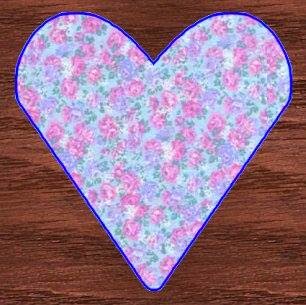
I filled mine with blue. This blue line is your cut line.
Deselect
This next part is optional, but useful if you need to snip around sharp points or curves.
Select the black shape layer. Select outside the black shape and expand by 3 pixels. Make a new layer and select that layer. Select the outside border. Expand by 3 pixels again and fill with red. This line shows you where to stop snipping. If you snip past this line, there will not be enough fabric under the shape to hold it down.
Go to Layers>Merge>Merge All and Save.

Before you print, arrange as many shapes on an 8 1/2 x 11" layout as you can to reduce the number of pages you have to print. Print 4 copies of your shape on freezer paper. 
  
Fabric Stabilizer (Perfect Sew): Add 1/2 teaspoon of clear Dawn dishwashing soap and 2 ounces of Elmer's clear washable glue to 16 ounces of cold water. Stir to combine. Spray on or soak fabric until wet. Allow to dry until damp and iron stiff. Stabilizes foundation fabric and appliqués. 
Cut one shape along the outside of the blue line. Label this one FABRIC.
Cut another shape along the outside of the red line. Label this one SNIP.
Cut a third shape along the outside of the black line. Label this one FOLD. 
Cut the last shape along the inside of the black line. Label this one BATTING. This is optional for stuffed appliqué.
Cut your fabric along the outside of the blue line. Remove the FABRIC paper shape.
Iron the SNIP shape onto the wrong side of the piece of fabric you just cut out. There should be a 1/4" of fabric around the paper.
Mark snip lines on the fabric about every 1/4".
Remove the paper and snip your fabric.
Brush a thick layer of washable glue onto the plastic side of the FOLD paper and iron it to the wrong side of the fabric. There should be about 3/8" of fabric along the outside of the paper.
Spray some starch into a cup and brush it onto the edges. Iron edges over this shape. Remove paper. Moisten the glue and iron the edges to the piece. Apply a bead of glue with a precision bottle to the edge of the appliqué and iron the appliqué onto foundation fabric.

Optional step for stuffed applique:
Pin the BATTING paper to a piece of double sided fusible cotton batting and cut out. Remove the paper. Place the fusible batting onto the wrong side of the fabric shape. Iron the right side of your fabric to fuse the batting. Turn the piece over and carefully iron the snipped edges to the batting. Now iron the piece to your quilt top.
Finished shape
Secure the turned edges by hand or machine.